
When Snapmaker announced the U1 with four independent toolheads, I was curious.
For years, most desktop multicolor 3D printers have relied on a single nozzle. The concept works, but it comes with two big drawbacks. Long print times, and a pile of purge waste every time the printer changes colors.
The Snapmaker U1 takes a different approach. Instead of feeding every filament through one nozzle, each filament gets its own dedicated printhead. On paper, this sounds like a much better solution.
If you want a deeper look at toolchanger printers in general and why they are suddenly everywhere, I wrote an overview on that topic here.
So after using the printer for several weeks, I wanted to answer one simple question. Does the four-toolhead system actually solve the biggest problems of multicolor printing?
Disclosure: Snapmaker sent me the U1 for review at no cost. I was not paid to write this article, and they only asked me to share my honest experience with the printer.
This is not a full long-term review, but my impressions after the first few weeks with the U1.
Basic Specification
| Specification | Details |
|---|---|
| Price | RM3,999 (price at the time this article was written) |
| Printer Type | FDM, CoreXY |
| Build Volume | 270 × 270 × 270 mm |
| Maximum Speed | 500 mm/s |
| Multi-color System | 4 independent toolheads (SnapSwap) |
| Toolhead Swap Time | Around 5 seconds |
| Maximum Nozzle Temperature | 300°C |
| Maximum Heated Bed Temperature | 100°C |
| Filament Diameter | 1.75 mm |
Unboxing and Build Quality
The unboxing and setup experience was fair. Nothing too hard, but it’s not plug and play either. Snapmaker provides a video guide for the installation, so just follow along and you’re good to go.
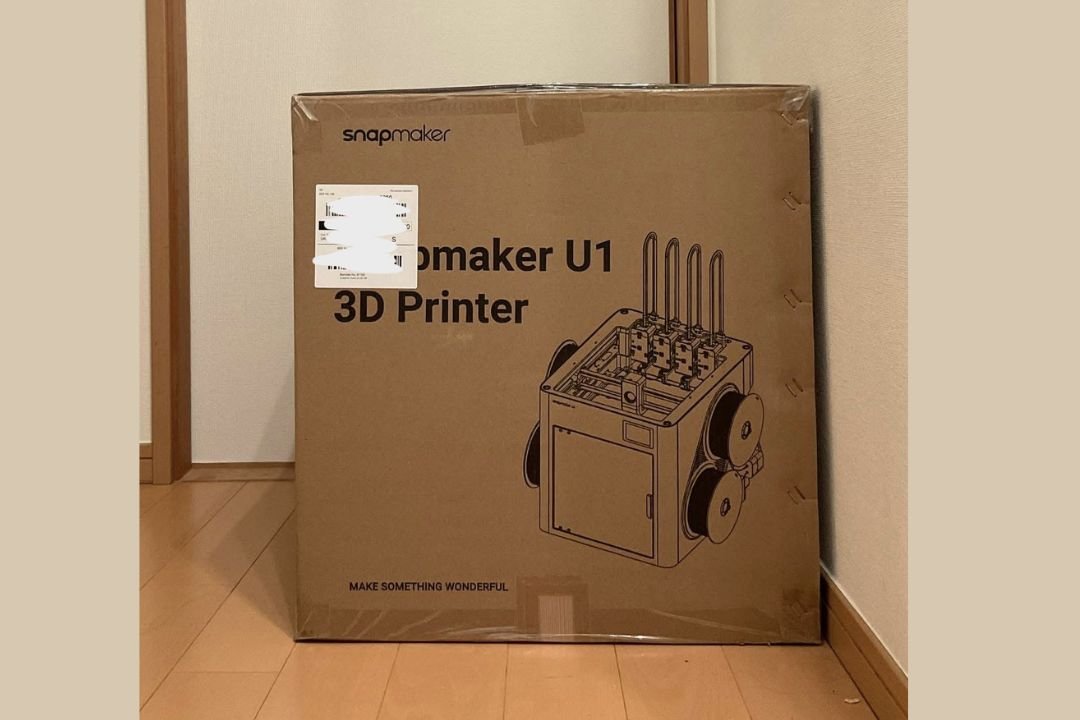
In terms of design, I like the style. The U1 looks good in the way other consumer products do, like a computer or a phone, rather than an industrial machine. It has clearly been through a proper product design process, with every part looking neat and integrated. That’s a contrast to some printers that feel more like DIY projects, where the working mechanism is simply bolted onto aluminium extrusions with little thought given to appearance.
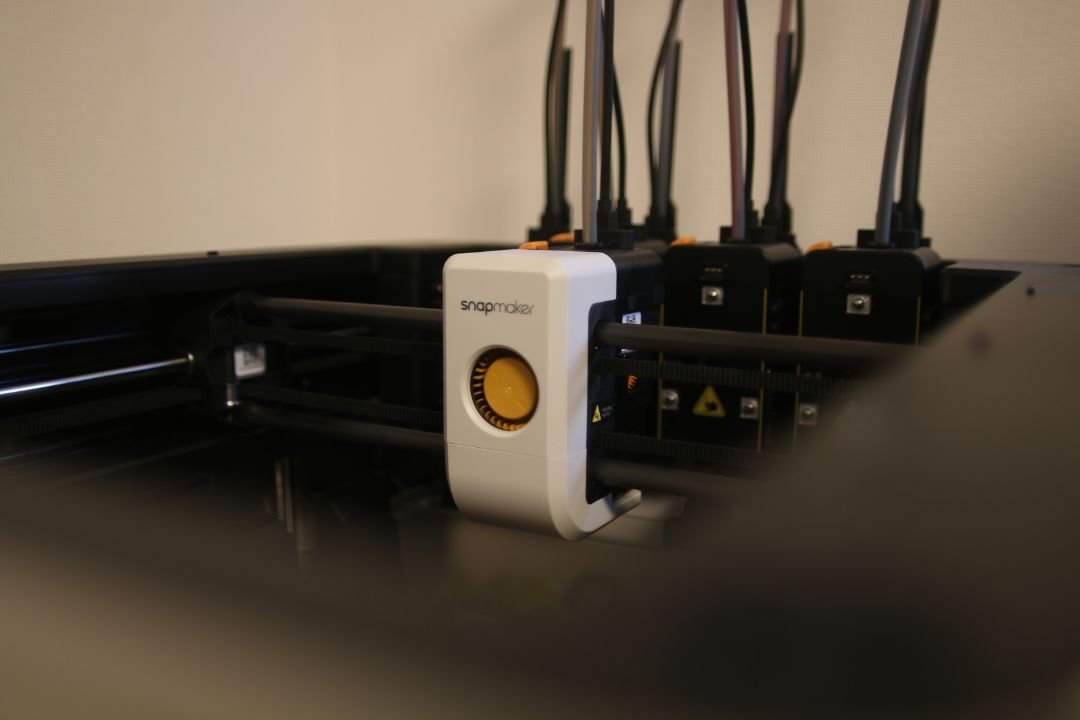
I also like that the lead screws are arranged on the sides instead of at the back. It makes them easier to reach for maintenance and cleaning.
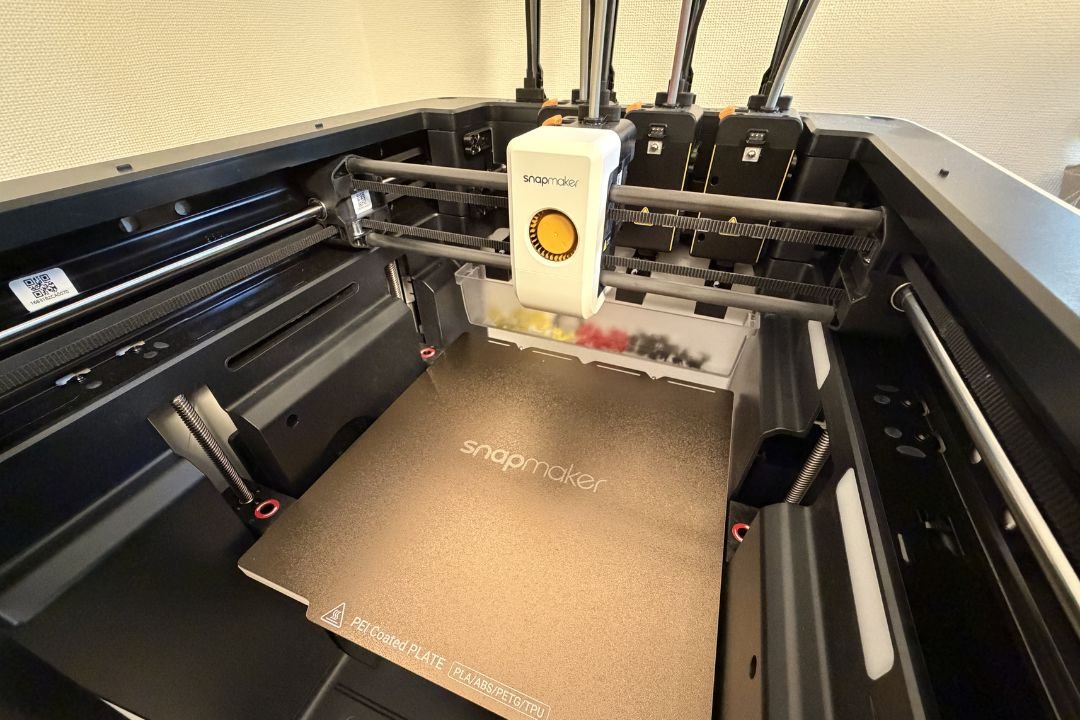
But there are some areas which I think can be improved.
The build quality feels a bit cheap in some areas, especially the top part. The plastic there is wobbly, and if you mistakenly try to lift the printer by the plastic plate on top, you could easily break it.
The inside of the printer also feels a bit cramped. When I pulled the bed out to remove it, it was easy to bump into the side cover, so there is a risk of scratching the plastic.
One more thing I don’t like is the USB port placement at the rear. As someone with many printers sitting close to each other, there’s very little room to reach the back of the machine. Compared to other brands that put the USB port in front, I don’t think this was a good move.
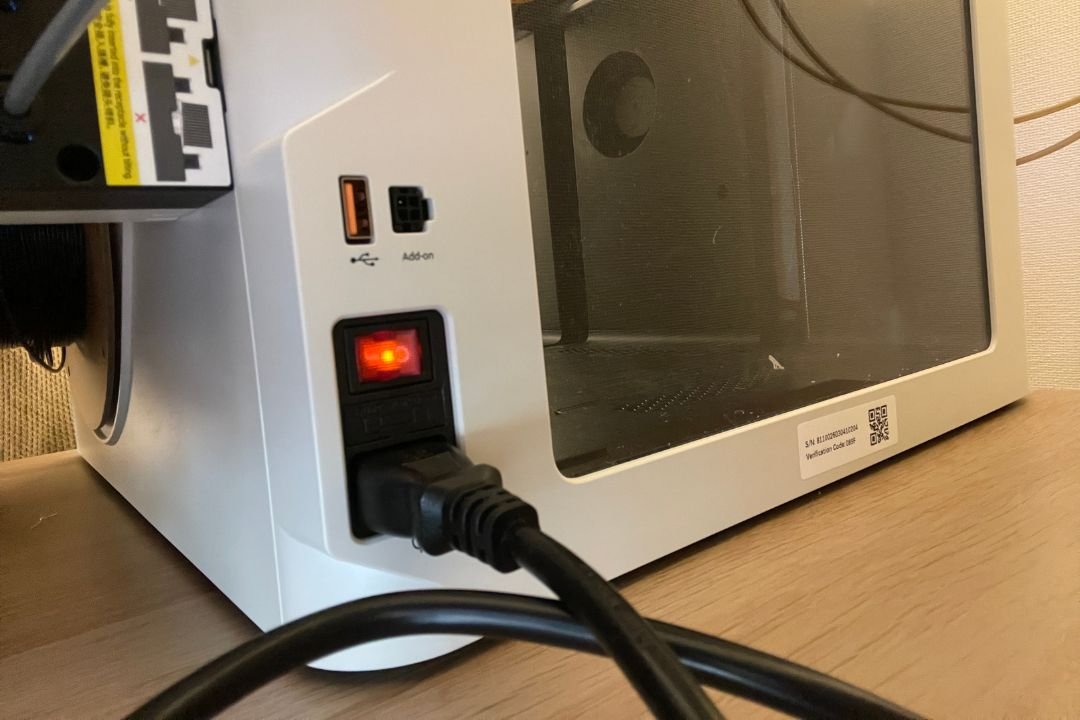
None of these affect the print quality itself, but they are worth knowing before you buy. Overall, I still like the design.
Print Quality
Let me get this out of the way first. The print quality is excellent.
Throughout my testing, I printed all sorts of models, from functional parts with engraved text to decorative multicolor figures. Surface finish was consistently clean, details were sharp, and dimensional quality was exactly what I would expect from a modern FDM printer.
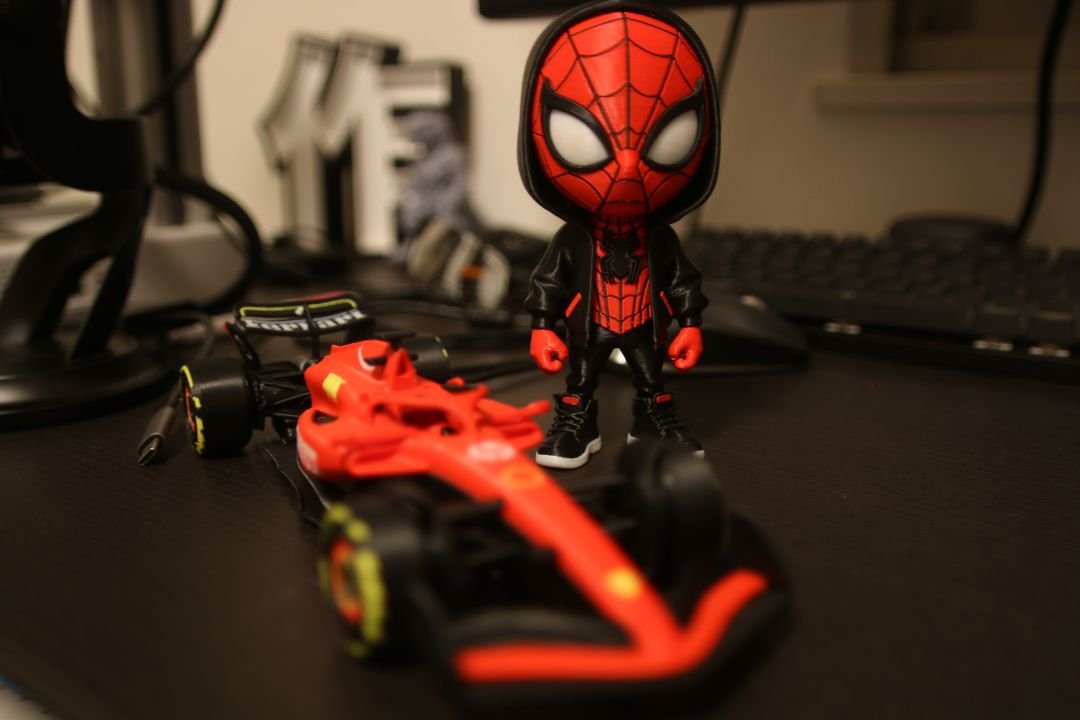
One thing that impressed me was the color separation.
Since each filament has its own dedicated nozzle, there is far less risk of leftover filament from the previous color contaminating the next one. This is one of the compromises single-nozzle multicolor systems have to manage through purging.
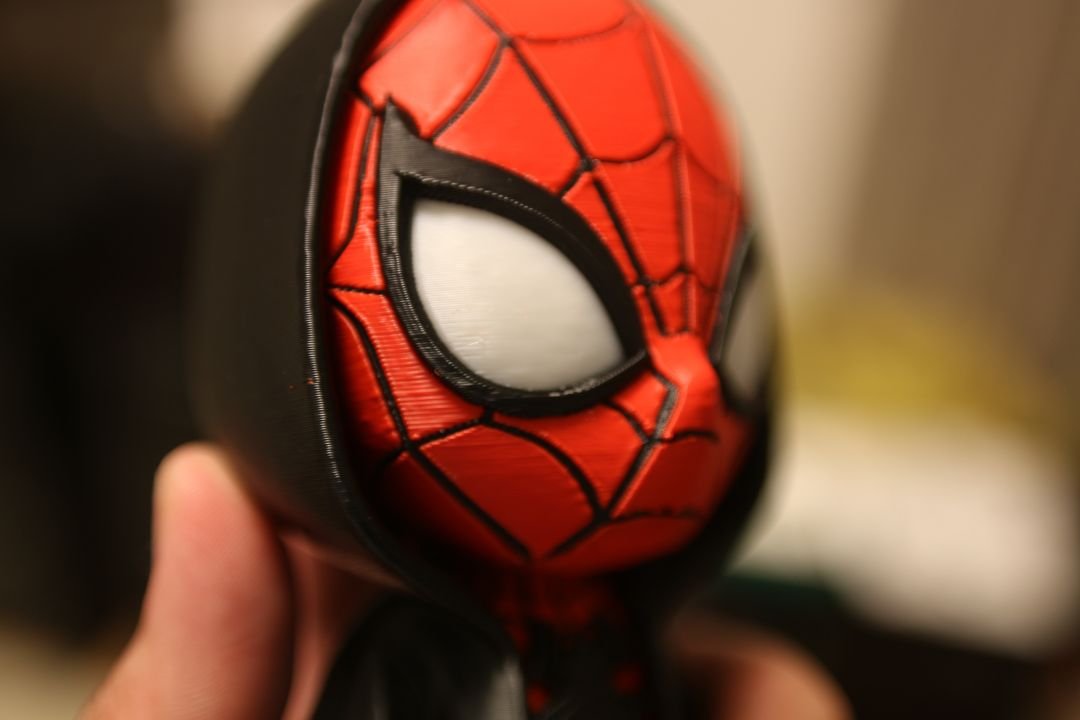
To test this, I printed a Spider-Man figure. The eyes are white, surrounded by the red and black of the mask, which is exactly where a single-nozzle system would risk contamination. The eyes stayed a very clean white with no visible color bleeding into them, and even tiny details like the Nike logo on the shoes came out clearly.
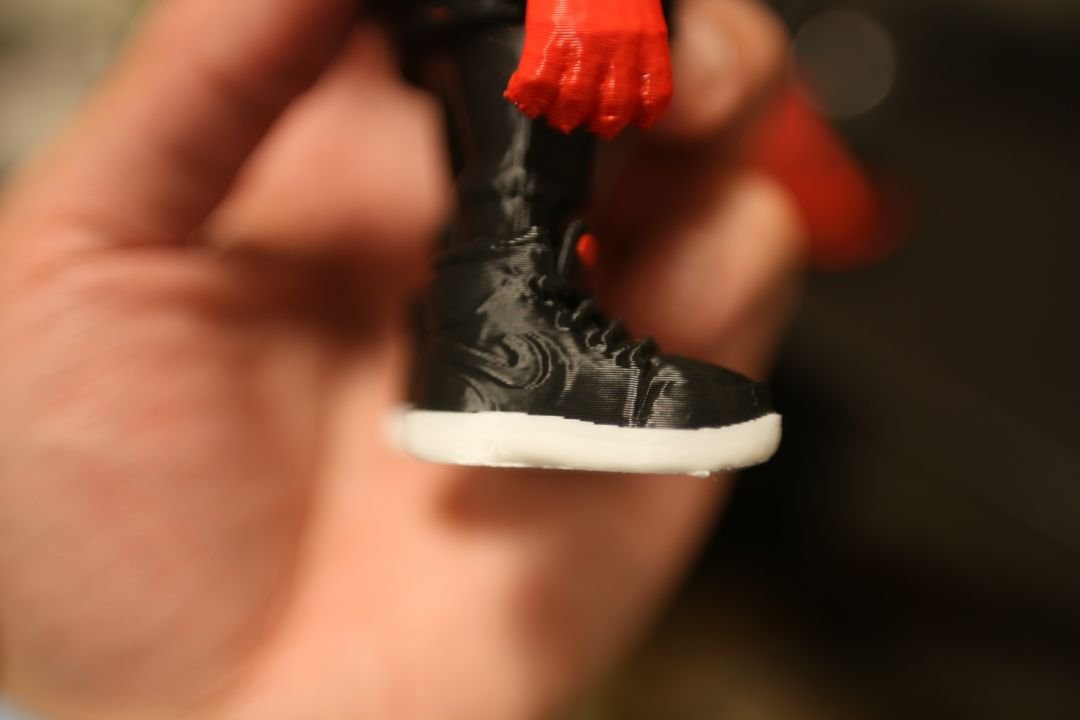
For an FDM printer, I am very satisfied with the overall print quality.
The Biggest Test: Four Toolheads vs Single-Nozzle Multicolor
Here’s the thing though. The biggest advantage of the U1 is not its print quality.
It’s how it handles multicolor printing.
To evaluate this, I printed the exact same four-color model using two different approaches:
- Snapmaker U1 with its four dedicated toolheads
- A conventional single-nozzle multicolor printer
The difference was immediately obvious.
The Snapmaker U1 completed the print in approximately 3.5 hours. The single-nozzle printer needed more than 11 hours for the same model.
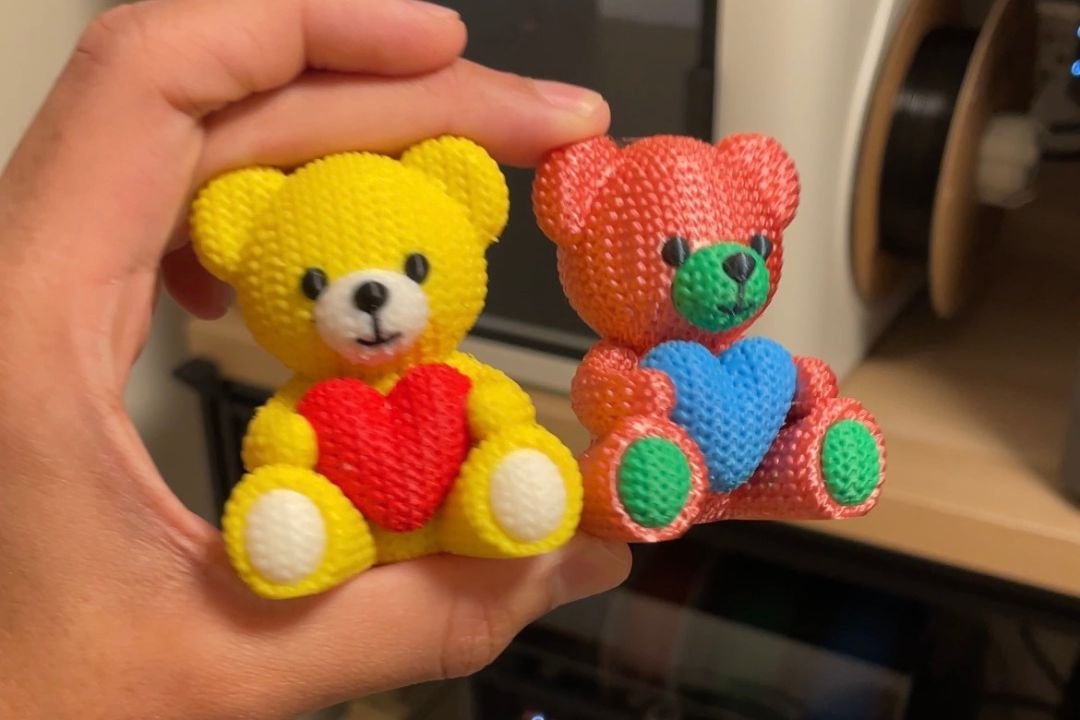
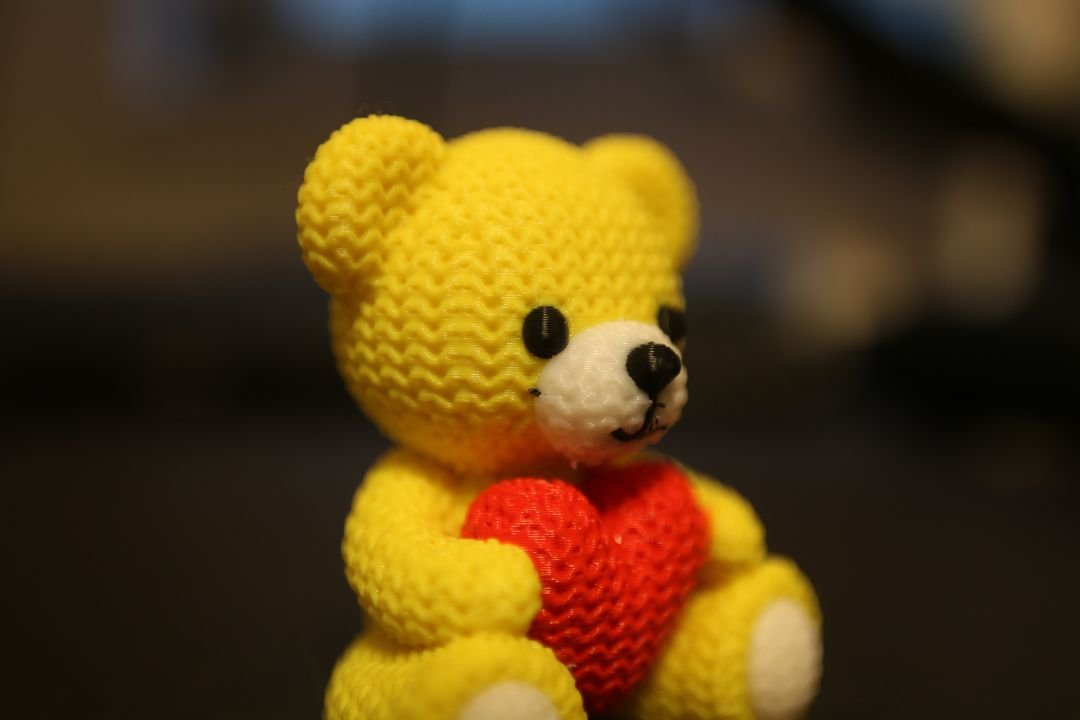
In terms of quality, both prints came out at the same level, with one small exception. The model was a teddy bear, and on the U1 print, a single black dot appeared on the teddy bear’s cheek where it shouldn’t be. That was the only flaw I could find in the result. Since I’ve been praising the print quality throughout this review, I think it’s only fair to point it out.
The amount of purge waste was also dramatically different. I haven’t weighed the purge waste from each test, but you can judge the difference with your naked eyes alone.
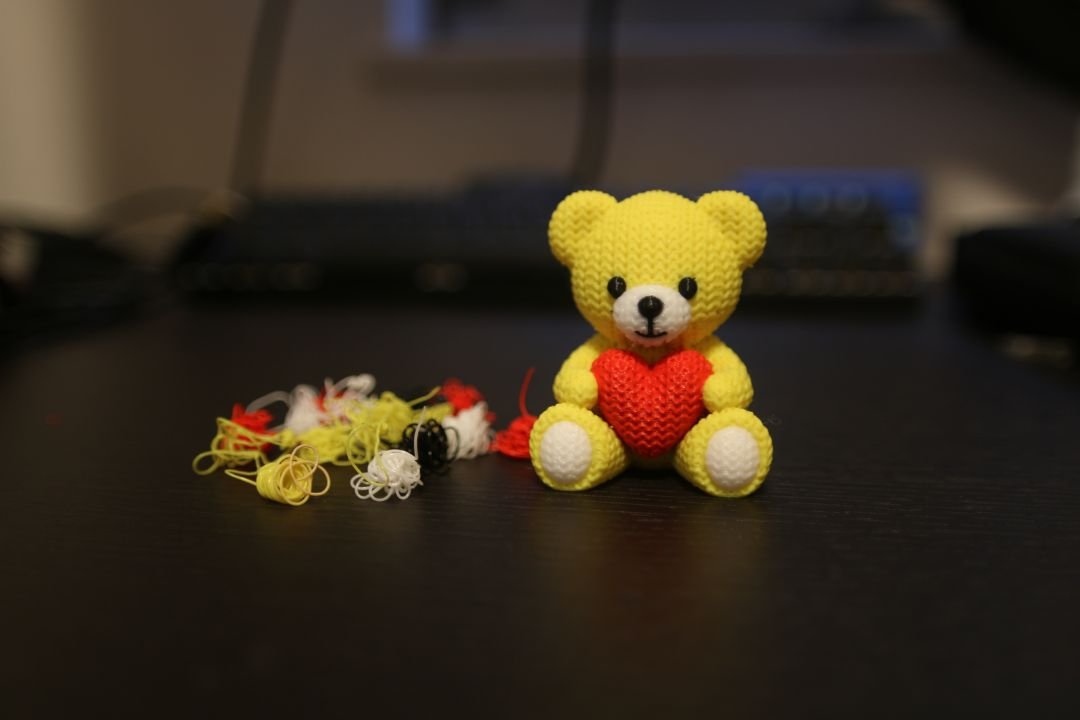
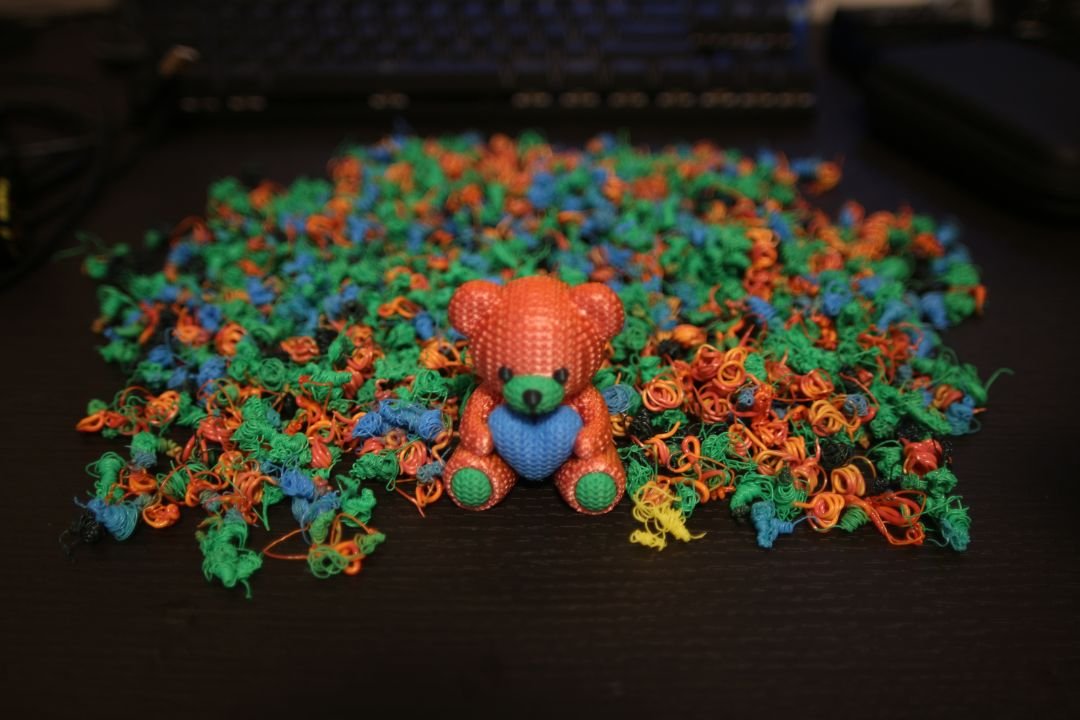
This is where the U1 makes the strongest case for itself. If you regularly print multicolor models, cutting both print time and wasted filament by this much makes multicolor printing far more practical than conventional single-nozzle systems.
Printing Multiple Parts in One Job
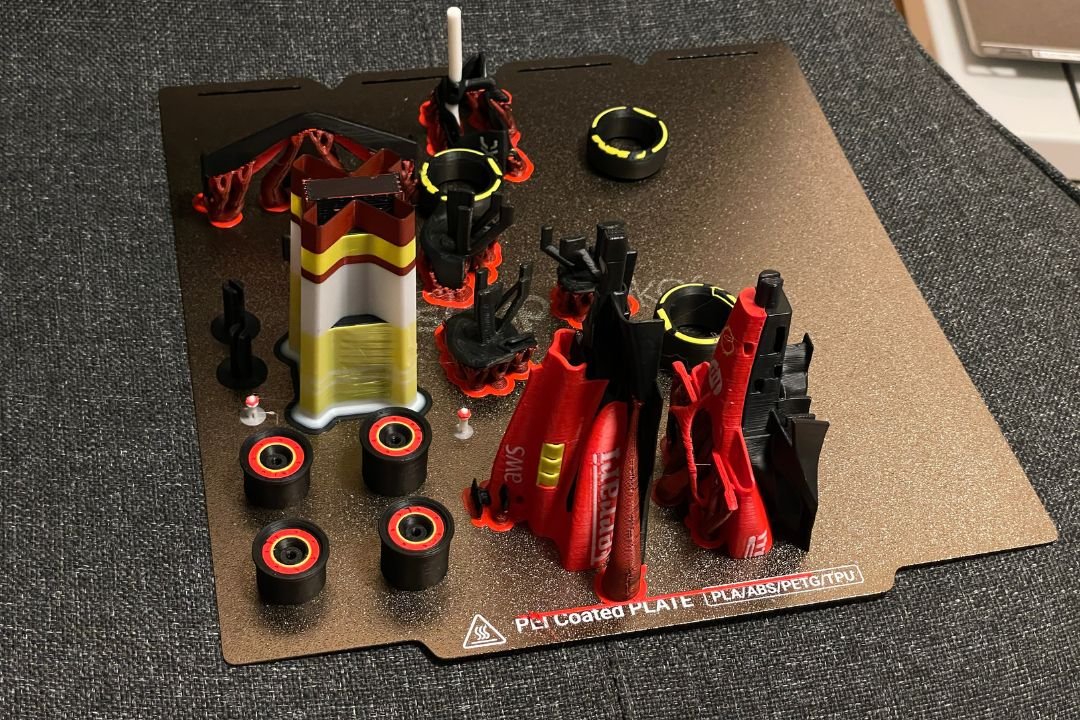
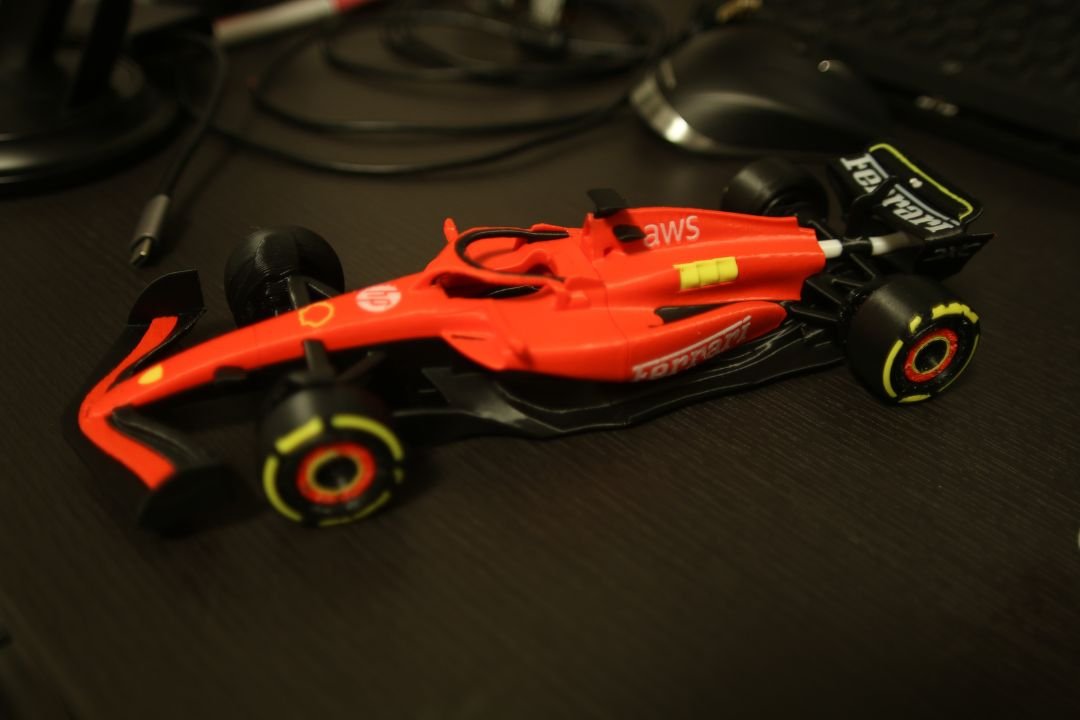
I also loaded up a single build plate with multiple multicolor parts of different shapes and sizes.
One model detached mid-print because I forgot to clean the build plate beforehand. That one was entirely my fault.
What impressed me was that the remaining models kept printing almost perfectly, even with one part turning into spaghetti next to them. The finished parts showed clean surfaces, sharp text, and consistent quality across the entire build plate.
Single-Color Printing
Since most prints are still single-color, I also wanted to see how the U1 performs without its four-toolhead advantage.
I printed the same model on the U1 and on another modern printer. The U1 finished in roughly 32 minutes, while the comparison printer took around 28 minutes.
Most of that difference came from the calibration process. Because the U1 has four toolheads, it spends more time preparing before each print. In normal use you don’t need to calibrate every single time, so don’t treat this as an absolute speed comparison.
From my testing, the U1’s strength is clearly multicolor printing, not being the fastest option for simple single-color jobs.
Software Experience
Overall, my experience with Snapmaker Orca has been okay. It’s better than some of the alternatives out there, but I wouldn’t call it the best yet.
During testing, I did notice one workflow issue. Even though the printer already knew which filaments were installed, I still had to manually assign those filaments inside the slicer. It felt like an unnecessary extra step.
By the time I wrote this review, Snapmaker had already released an update that syncs the installed filaments automatically. Since the issue has been resolved, I no longer consider it a drawback.
One small usability issue still remains. Several members of my audience pointed out that some of the icons on the printer differ from what most other 3D printer brands use. It’s not a functional problem, but if you’re coming from another ecosystem, you may occasionally pause to figure out which icon does what. Minor, but it does affect the overall user experience.
What About the Cons?
When I started writing this review, I really wanted to weigh the pros and cons based on my own experience. The problem is, apart from the build quality complaints I mentioned earlier, there is not much on the cons side for me to report yet.
One thing I did notice is that supports printed with the default settings are a bit hard to remove.
It’s not a big deal for experienced users, since you can easily adjust this in the slicer. But if you’re a beginner who depends entirely on default settings, you might struggle a little.
I could not find anyone else complaining about this, so I’m not sure if it’s just my unit and my models, or if other users simply don’t think it’s worth mentioning. Take this one as a personal observation rather than a confirmed weakness.
Things I Have Not Tested Yet
Since I have only used the printer for several weeks, there are still areas where I cannot give you a fair conclusion.
The biggest one is long-term reliability. I simply do not know whether the printer will perform just as well after one or two years of regular use.
I also have not experienced clogged nozzles or major maintenance procedures, so I cannot comment on how easy or difficult they are.
These are areas I plan to revisit in a future long-term review.
Community Feedback Worth Mentioning
Although I have not personally run into these issues, I think it’s only fair to mention feedback shared by other U1 users.
Some users reported that clearing clogged nozzles can be more complicated than on conventional printers, and that the maintenance guide could be improved. Others mentioned difficulties when printing PETG.
I have not verified these reports myself, so I cannot say whether they are widespread or isolated cases. I simply think you should be aware of them rather than relying only on my experience.
Who Should Buy the Snapmaker U1?
Let me be clear about one group first. This is definitely not a printer for beginners.
A four-toolhead mechanism is far more complex than a regular single-nozzle printer. More complexity means a higher risk of something going wrong, and when it does, it will be tougher to fix. That is not something a beginner can handle easily. If this is your first 3D printer, I still recommend starting with a single-nozzle printer.
If you mainly print single-color functional parts, there are also plenty of excellent printers on the market, and the U1’s headline feature won’t do much for you.
But if you already have some experience and multicolor printing is something you do regularly, this is where the U1 shines. The four-toolhead system attacks the two biggest pain points of multicolor printing, time and waste, and in my testing it delivered on both.
Conclusion
After several weeks of testing, my first impression of the Snapmaker U1 is very positive.
The biggest achievement is not simply that it produces good-looking prints. It makes multicolor printing significantly more practical. Compared with conventional single-nozzle multicolor systems, it greatly reduces print time and purge waste while maintaining excellent print quality.
At the same time, I am deliberately avoiding conclusions about long-term reliability, because I have not owned the printer long enough to make those claims. I’ll continue using it over the coming months and update this review if my experience changes.
If you’d like to know where to buy 3D printers in Malaysia, check out the 3D printer store list I’ve put together on Domechy.
Looking to buy a 3D printer in Malaysia?
We’ve put together a curated list of 3D printing shops, filament suppliers, and service providers across Malaysia.
View the directory →Don’t miss the latest articles and guides
Get new Domechy articles, guides and free models straight to your inbox.

Wanna share your thoughts or request anything? Comment below.