

Recently, I was sent a 3D scanner, the Xscanner 3D from Xhorse, to test. In the first two weeks of using it, I picked up a lot of new knowledge and experience, since I had never used any 3D scanner before this. So this write-up is my experience using a 3D scanner for the very first time, over a two-week period.
Quick Specifications
| Specification | Detail |
|---|---|
| Price | RM3,999 (free software) |
| Measurement Rate | 420,000 measurements/sec |
| Laser Class | Class I (eye-safe) |
| Working Distance | 350mm |
| Scan Accuracy | Up to 0.05mm |
| Scan Resolution | 0.05mm – 2mm |
| Weight | 425g |
| Dimensions | 239 x 66 x 62mm |
| Operating Temperature | 0°C – 40°C (optimal 20°C) |
Unboxing
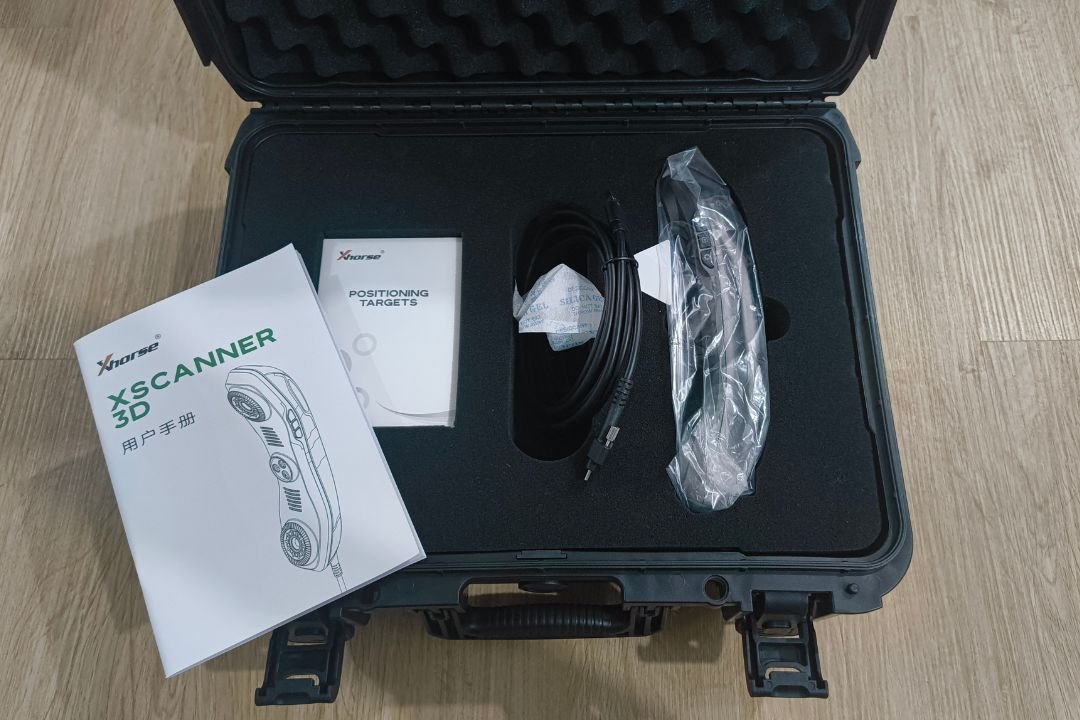
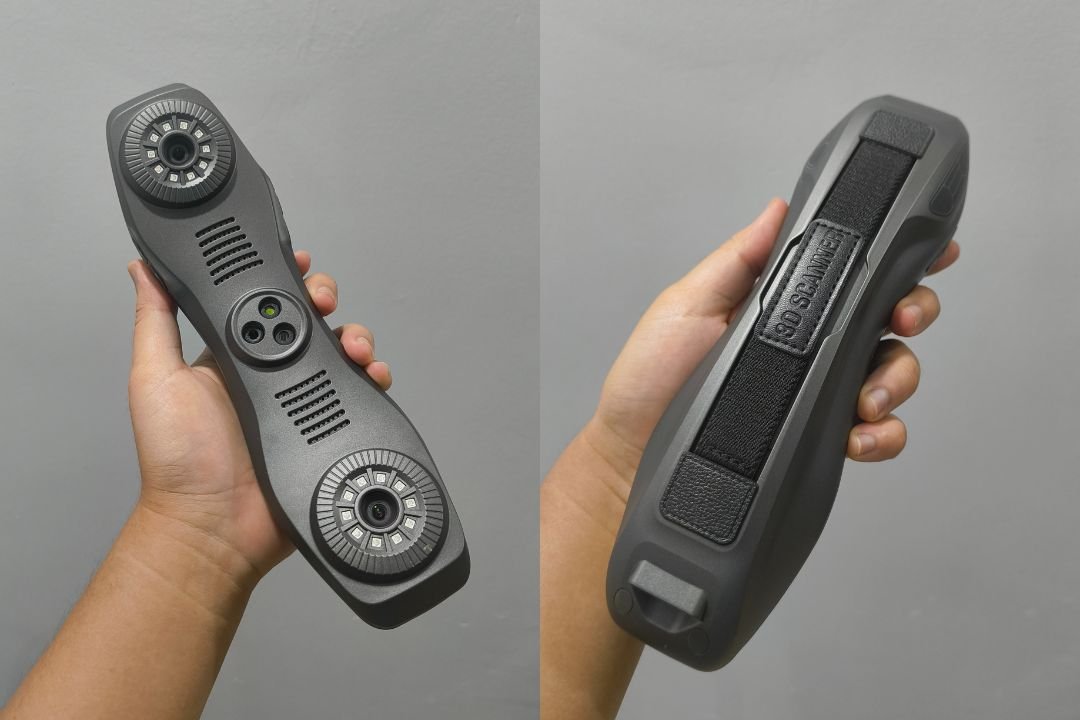
The Xscanner 3D set comes in a sturdy hard case. Inside, you get the scanner device itself, a USB-C to USB 3.0 cable, positioning markers, tracking marker balls, and a calibration plate. There is also a physical manual included, but I preferred to follow the online manual, which is available in English.
Setting Up the App and Device
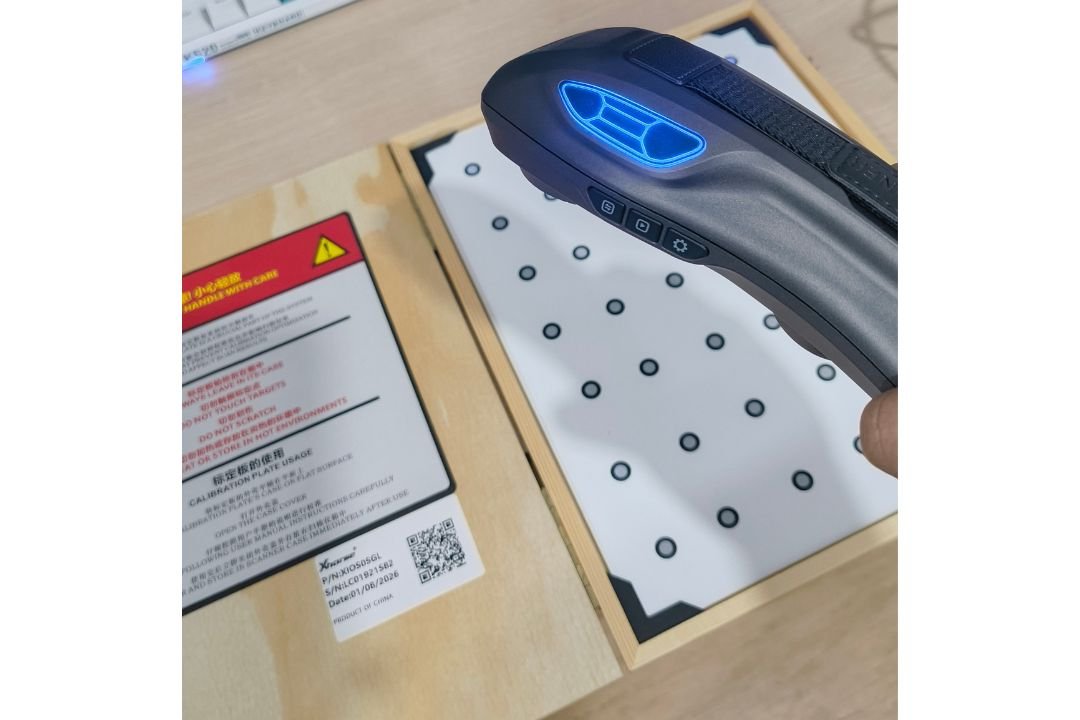
Before I could start scanning, I first had to download the Xscanner 3D app onto my computer. In the app, I registered the device by entering the serial number or scanning a QR code. Once the device was registered, I had to run a calibration since this was the first time using it. The calibration uses the scanner together with the calibration plate, where I had to scan 30 marker points at the correct distance and angle. After the calibration was done, I could finally open a new file and start scanning objects.
First Object: Perfume Bottle (Dark)
The first object I scanned was a small-to-medium perfume bottle. Before starting, I stuck positioning markers on a few parts of the bottle and on the table surface. Then I started scanning using multi-line mode, which uses 14 paired laser lines to capture data in bulk.
For the first attempt, I placed the bottle standing upright on the table. The result was not good and a lot of data failed to capture, so plenty of ‘holes’ appeared on the surface of the object. I switched to single-line mode, which uses just a single line to capture data in more detail. This increased the amount of data captured and closed some of the earlier holes, but there were still many surfaces that did not scan.
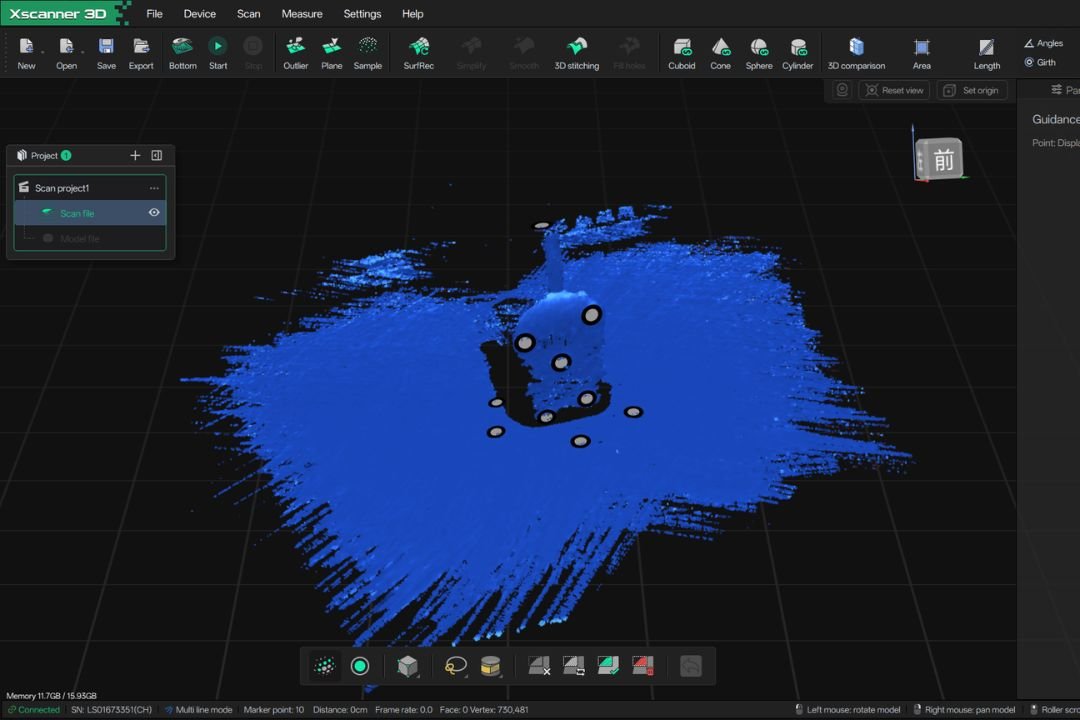
So I tried laying the bottle down for a second attempt. This time, a lot more data was captured.
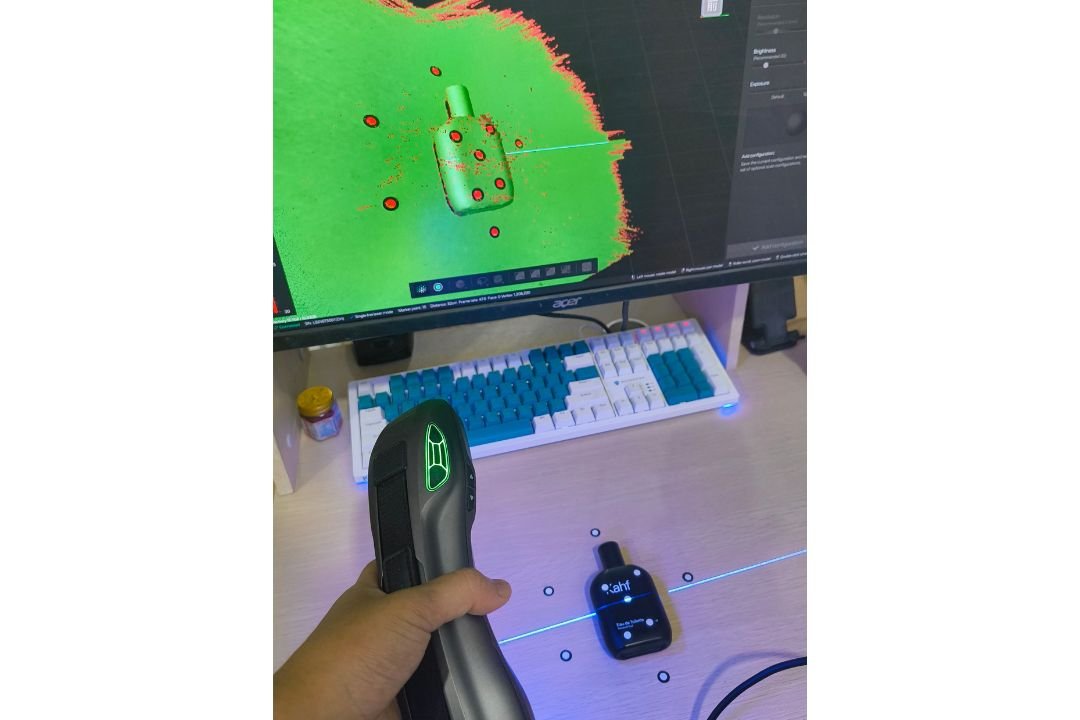
But this created another problem, which is that the back of the object could not be scanned. After watching a few reference videos, I did a third attempt with the bottle standing upright again, but this time on a rotating surface. As a result, I managed to scan almost every part, meaning the front, sides, and back. Only, like the first attempt, there was still some surface data that failed to capture because the bottle was placed standing upright.
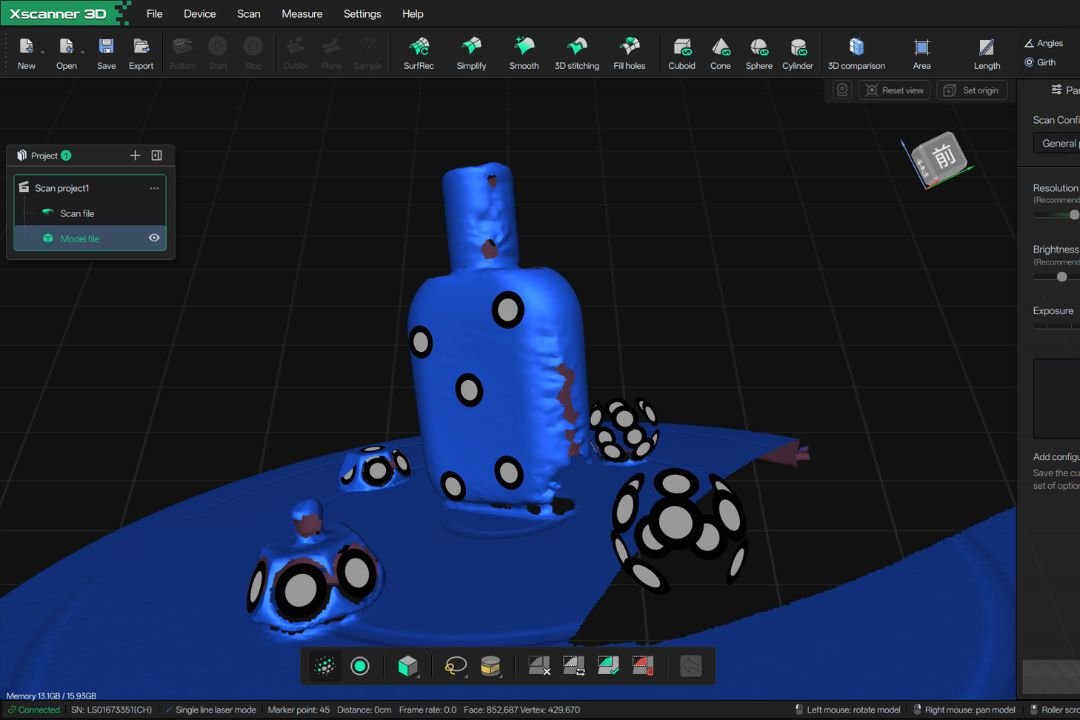
At this point I was fairly stuck on why my scan results were not as good as the ones in the reference videos. After making some comparisons, I concluded that the biggest factor behind my poor scans was that the object I was scanning was black. I tested this conclusion by switching to a different object.
Second Object: Sunscreen Bottle (Bright)
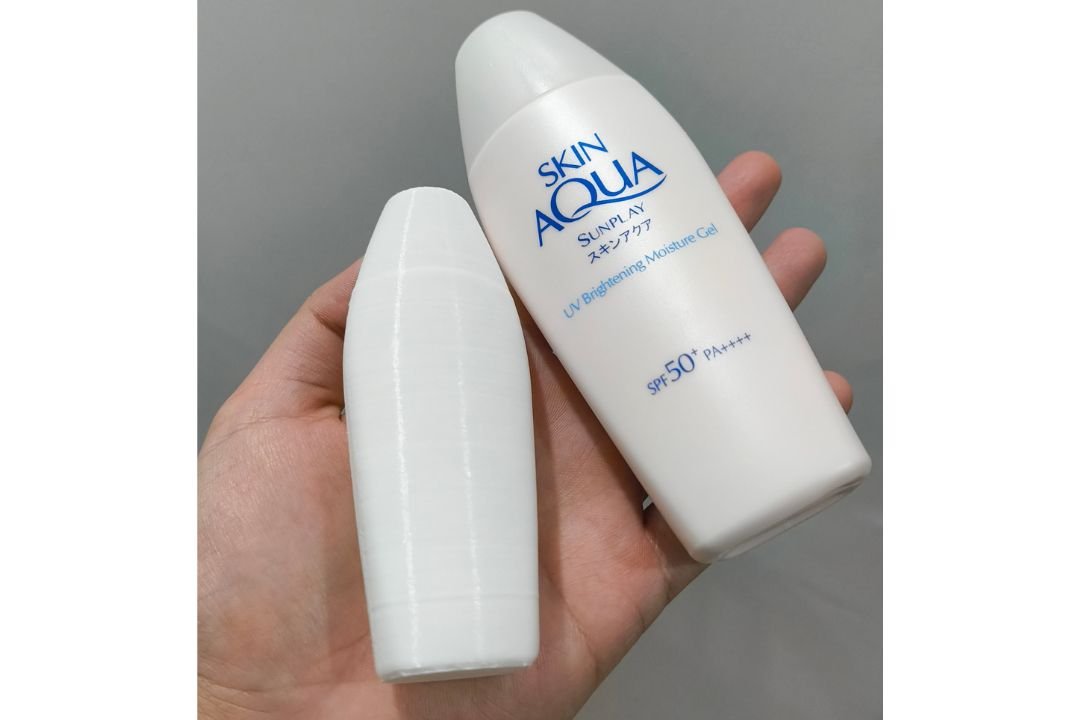
For the second object, I used a bright pink sunscreen bottle and placed it standing upright. This time I did not stick any positioning markers on the bottle, only on the rotating surface, purely to test the earlier conclusion. The result was very good and all the surface data was captured well, to the point that no ‘holes’ appeared.
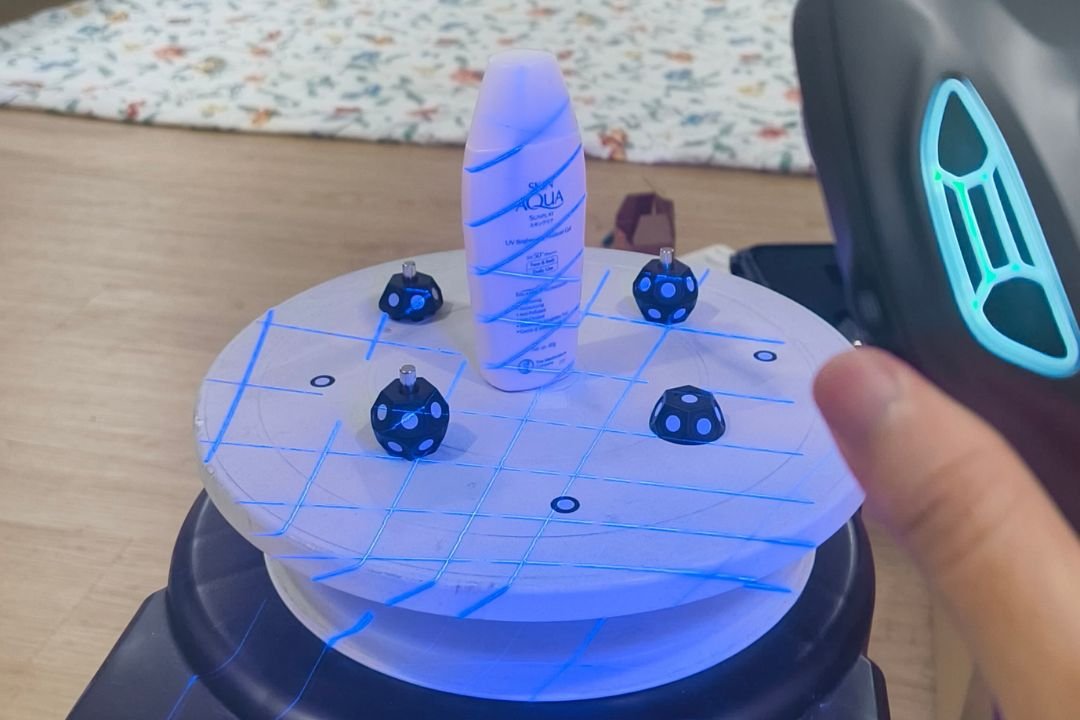
After finishing the scan, I did a bit of post-processing inside the Xscanner 3D app. First, I pressed the ‘SurfRec’ function, which automatically cleans up the scanned model until the surface is smoother and tidier. Then I exported the model in .obj format and brought it into Blender. It was only here that I noticed the bottom of the model was open because it had not been scanned. So I just added a new surface on the bottom and tidied it up. In the end, I got a good 3D model.
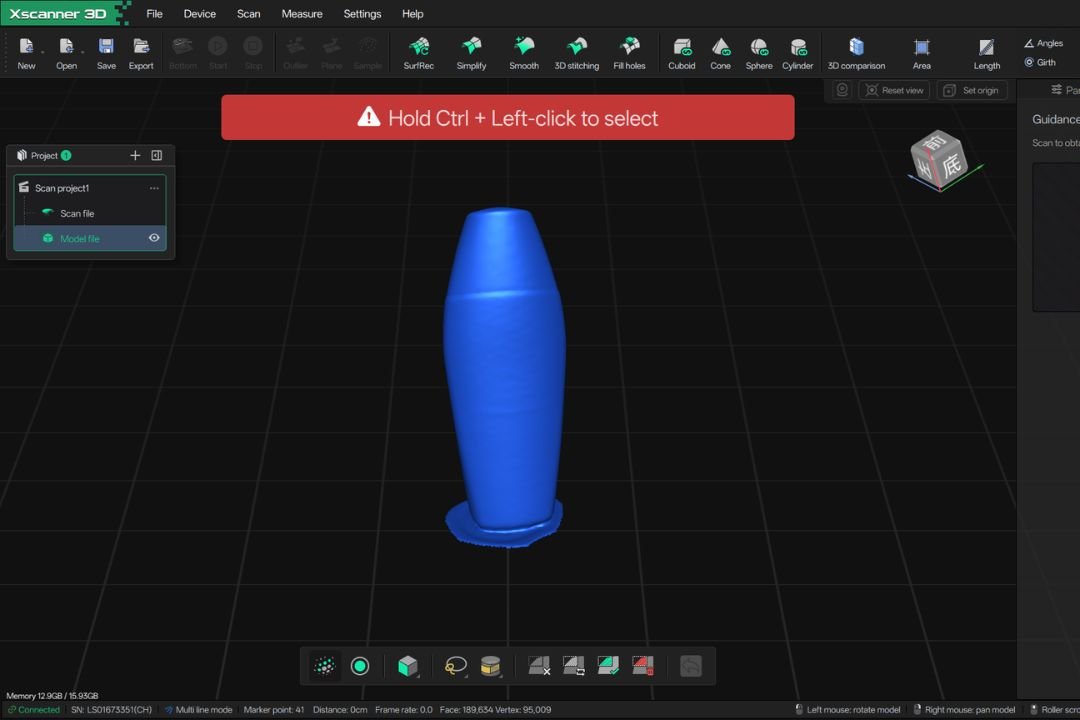
Out of curiosity, I also exported the model to .gcode format and 3D printed it on an Ender 3 V2 at a slightly smaller size. The print came out clean too, matching the quality of the model and the scan.
What I Learned From the First Two Objects
After seeing the difference in results between these two objects, I learned something very important: the colour and brightness of an object has a big effect on scan quality. I also learned that dark objects do not necessarily give bad results. They just need the ‘Black’ setting under the exposure parameter in the Xscanner 3D app, a setting I had not changed before this. That was a mistake on my part, but at least now I know which setting to change if I want to scan a dark object.
Third Object: Diecast Car Model (Small)
Next I tested scanning a small object using a diecast, specifically a 1/64 scale Subaru Impreza WRX STI model car. This object is blue, so brightness was not an issue. However, its surface is highly reflective. So I switched the setting from ‘Default’ to ‘Specular’, since this setting is made specifically to make scanning shiny surfaces easier. I also leaned more on single-line mode to capture the fine details on the object’s surface.
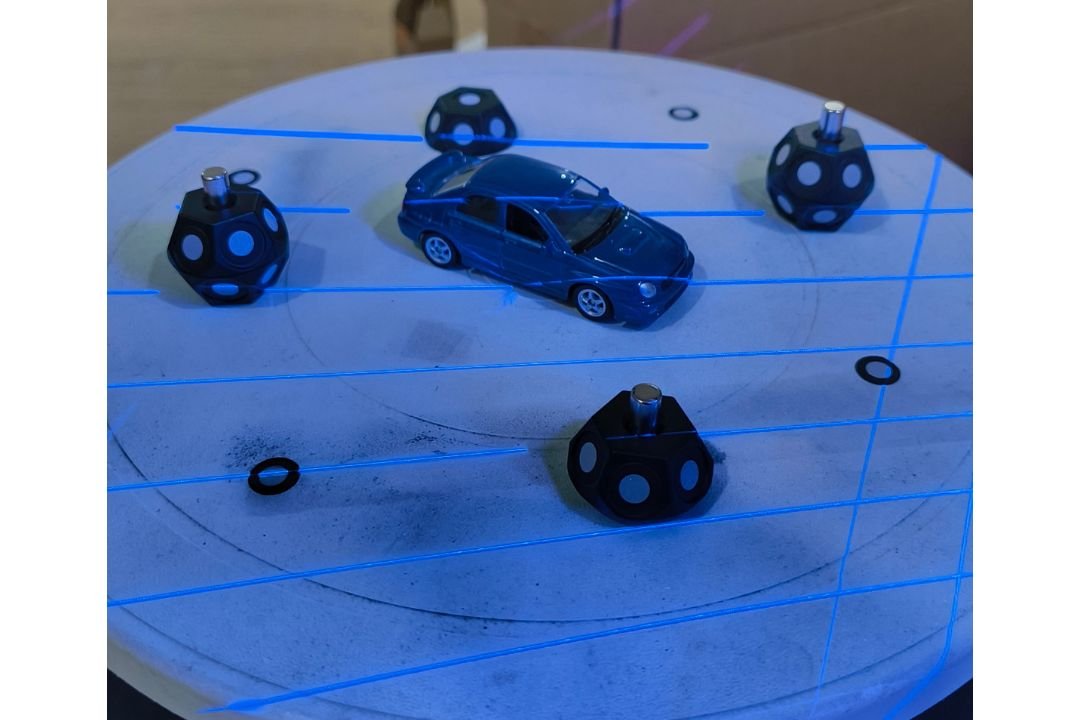
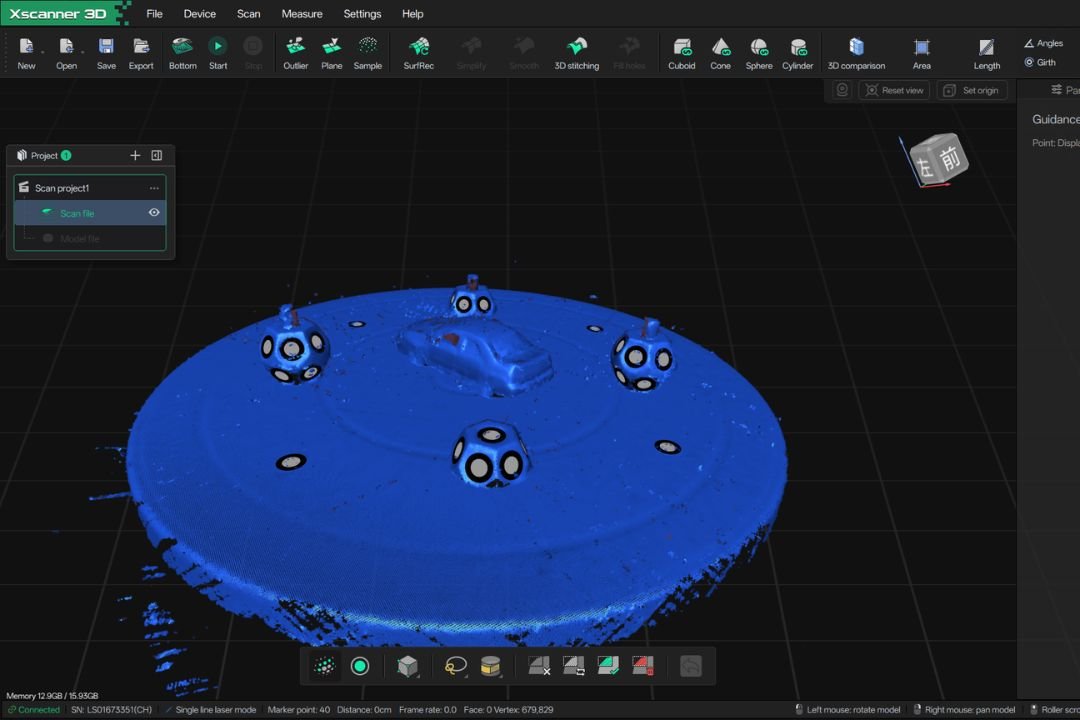
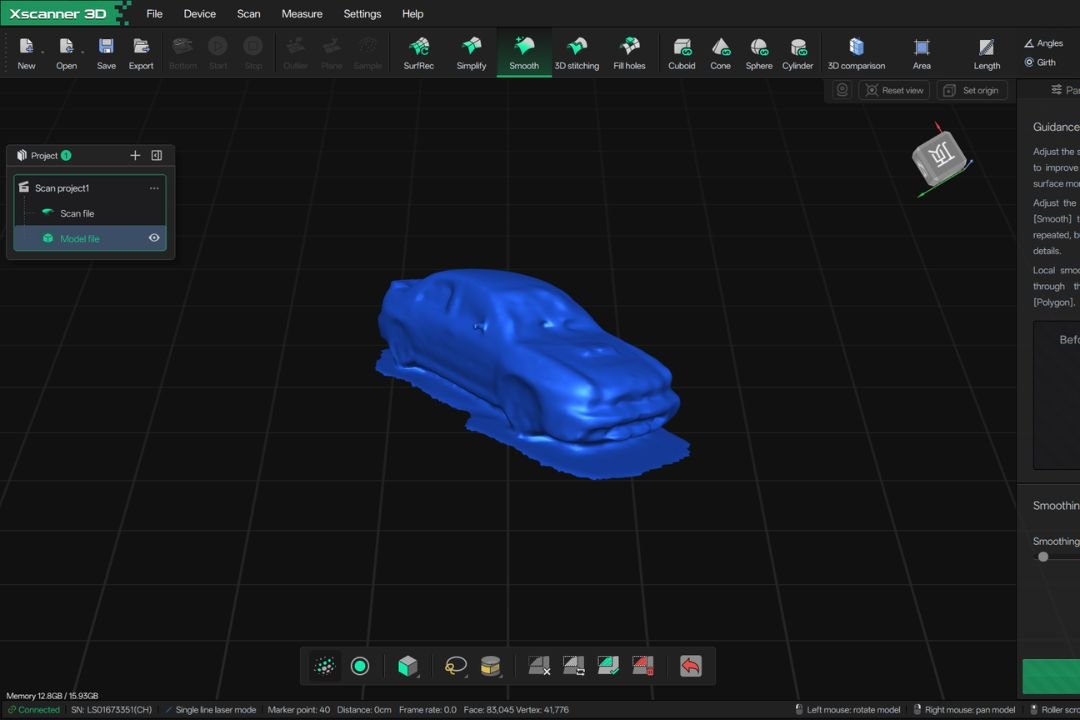
The result was fairly good and detailed, just with a few small holes that needed tidying up. In the post-processing for this object, after ‘SurfRec’ I pressed the ‘Fill hole’ function, which automatically closes the holes in the scan result. The result was a clean 3D model.
Fourth Object: Mouse (White and Black)
The last object was a computer mouse. Even though it is white, there are a few black parts, so this was a good test to see how well the device handles both bright and dark surfaces at once.
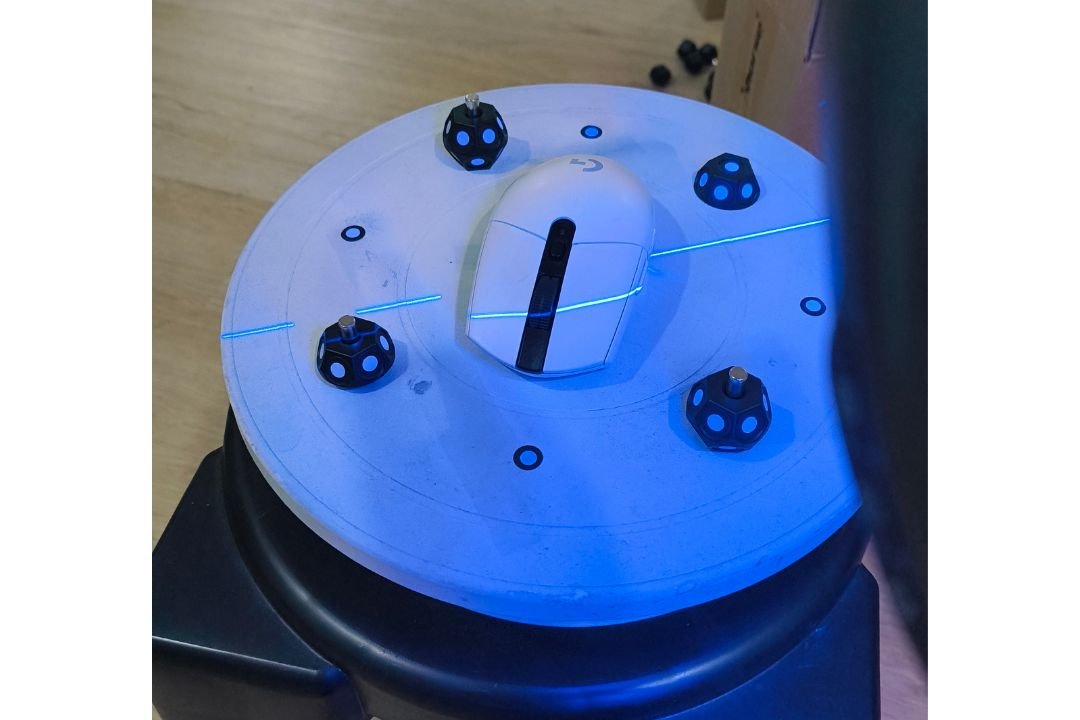
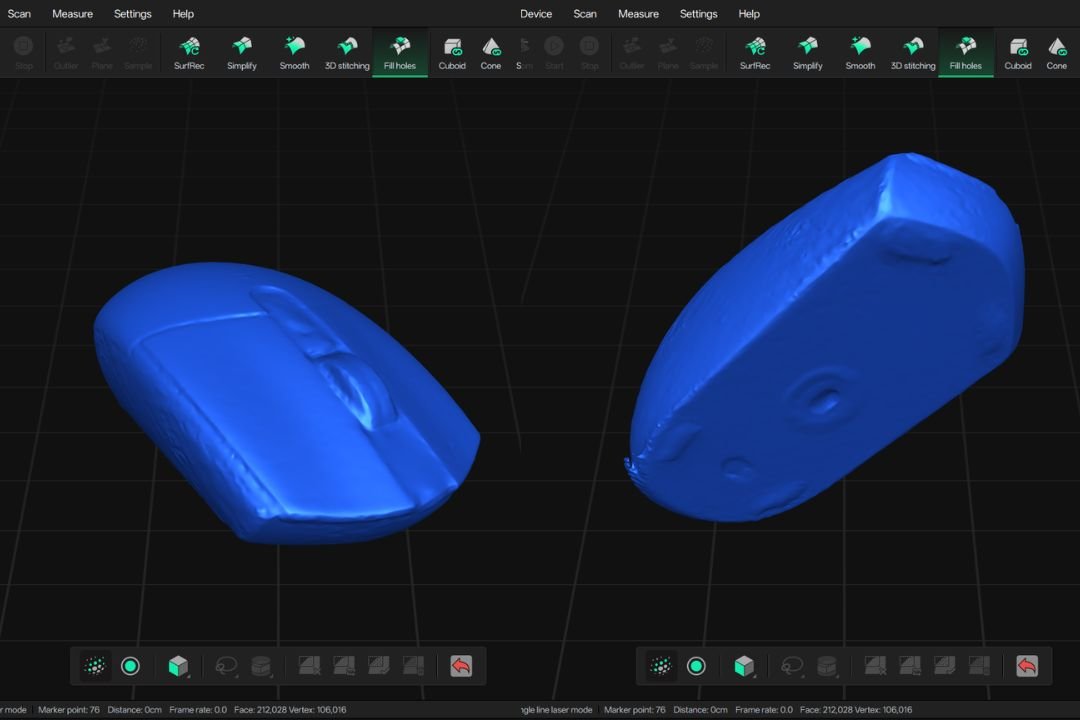
As usual, this object was scanned from all angles using the rotating surface for a complete result. Since the previous scans had no closed surface on the bottom, I tried doing an extra scan by flipping the mouse over and scanning its underside. Now I had two scan results.
From these two results, I used the ‘3D stitching’ function, which merges the two scans into a single model with more complete surface data. However, the black part of the mouse was fairly hard to capture fully. The solution, once again, was to use the ‘Fill hole’ function like before. The final 3D model came out good and complete.
Who Is the Xscanner 3D For?
In my opinion, the Xscanner 3D, or any 3D scanner, is suited for people who need to produce a 3D model based on a real object. 3D printing enthusiasts who print a lot of practical items are a great fit, because it makes preparing a model with the right shape and dimensions much easier, for example when printing car parts.
Early Verdict
Throughout using the Xscanner 3D, I have to admit that learning to use a 3D scanner is genuinely hard at first. First, it takes time to get used to how the device and its app work, along with the factors that decide whether a scan turns out good or bad. Second, the scan results require some basic ability with CAD software to clean up and modify the model so it can be used in the real world, such as for 3D printing. There is no denying that a 3D scanner gives its user broad capability to ‘reverse-engineer’ an object however they need.
So my recommendation, if you plan to get a 3D scanner, is to learn a bit of basic 3D modelling first so you can make the most of it.
Keep in mind, this account is based on early use of the Xscanner 3D in the first two weeks only. Among the tests I want to do next is scanning larger and more practical items like shoes and car parts.
Looking to buy a 3D printer in Malaysia?
We’ve put together a curated list of 3D printing shops, filament suppliers, and service providers across Malaysia.
View the directory →Don’t miss the latest articles and guides
Get new Domechy articles, guides and free models straight to your inbox.

Wanna share your thoughts or request anything? Comment below.