

Let me get one thing out of the way first. There is no black and white answer to which brand or model you should buy. Anyone who tells you “just buy X, it is better” is skipping the most important part of the conversation, which is what YOU actually need.
And if we are going to compare the Snapmaker U1 with a Bambu Lab printer, it is only fair to compare it with a model in the same price range. Otherwise the whole comparison is meaningless.
At the moment I am writing this, the Snapmaker U1 is sold in Malaysia at around RM3,999. So I checked Bambu Lab’s authorized seller and distributor in Malaysia, and the closest multi-color printer to that price is the Bambu Lab P2S Combo, sitting at the exact same price, RM3,999. Perfect. Same money, let us see what each one gives you.
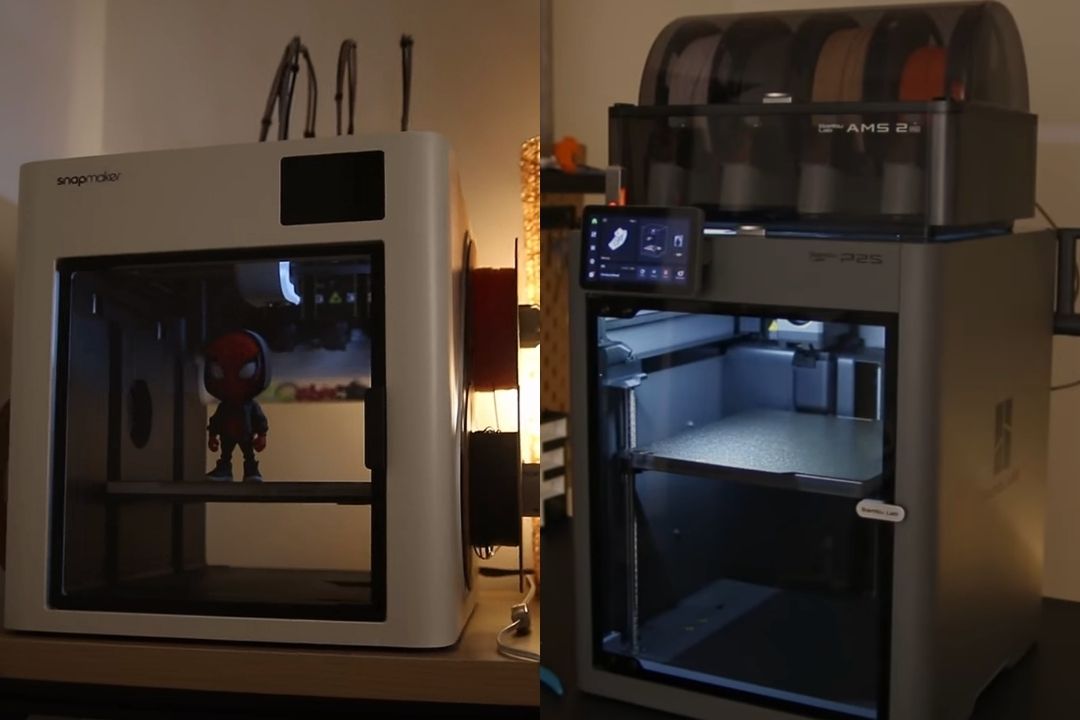
On paper they look similar
Before I share my opinion, here is a quick look at the two machines side by side. On paper, they are closer than you might think.
| Spec | Snapmaker U1 | Bambu Lab P2S Combo |
|---|---|---|
| Price in Malaysia (at time of writing) | RM3,999 | RM3,999 |
| Colors out of the box | 4 | 4 (via AMS 2 Pro) |
| Build volume | ~270 x 270 x 270 mm | 256 x 256 x 256 mm |
| Motion system | CoreXY | CoreXY |
| Nozzle temp | up to 300°C | ~300°C class |
| Bed temp | up to 100°C | up to 110°C |
| Camera + AI monitoring | Yes | Yes |
| Multi-color method | 4 separate toolheads | 1 nozzle + AMS |
| Enclosure | Partial / passive top cover | Fully enclosed by design |
| Filament drying | None | AMS 2 Pro dries up to 65°C |
| Max colors | 4 (fixed) | 4, expandable up to 24 |
The numbers look close. But the way each machine actually works, and the way it feels to live with, is where they split apart completely.
Who the Snapmaker U1 is really for
I personally think the Snapmaker U1 is made for one specific type of person. Someone whose main priority is to print multi-color models, limited to 4 colors, as fast as possible, with limited or zero filament waste. That is it. If that is you, and you can take the tradeoffs, the U1 beats the P2S by miles.
Notice I said “if you can take the tradeoffs.” So let us talk about them honestly, because they are real.
Tradeoff 1: four toolheads means more things that can break
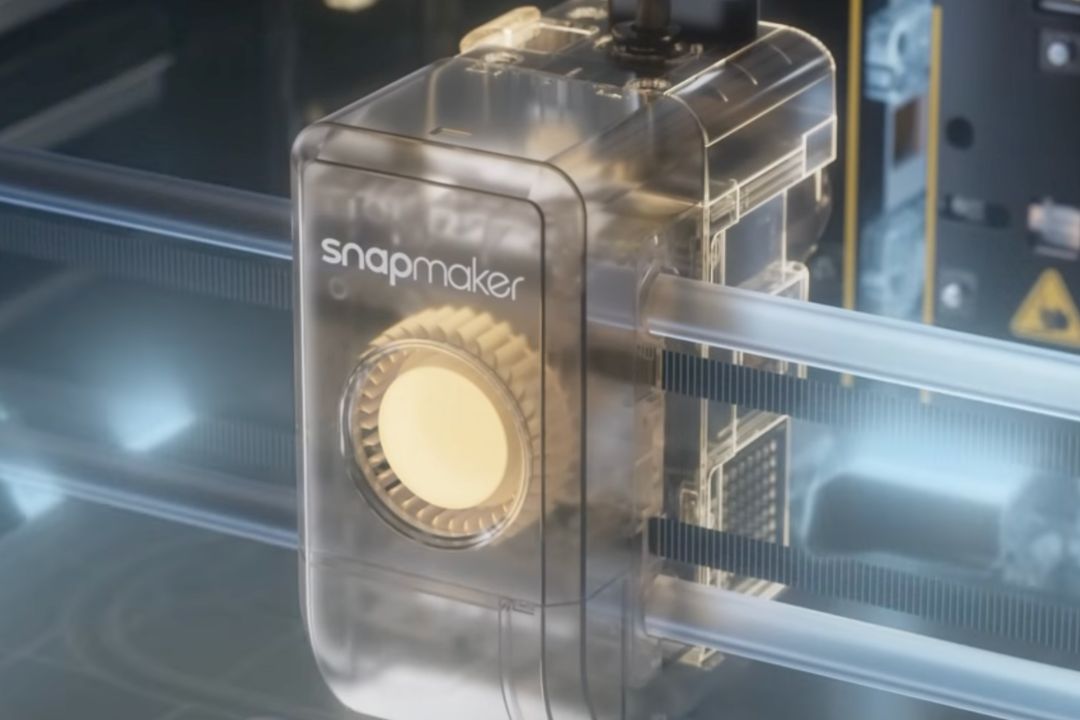
The U1 has 4 toolheads. That means at least four times the risk of failure just at the toolhead, compared to a single-toolhead machine. And each U1 toolhead is relatively more complex than a Bambu Lab toolhead.
In the Snapmaker U1 user community, I have seen members report that fixing a clogged toolhead means you have to open it up, and inside there are bolts of multiple different dimensions. Some users even reported that the official guidance was not always that useful, and they had to figure out the fix themselves.
What this tells me is simple. To live with this printer comfortably, it helps a lot to have decent mechanical skills and the confidence to fix machines yourself. If you do not, you will end up outsourcing the repair to someone else, which costs time and money.
Tradeoff 2: the ecosystem is not as mature as Bambu Lab
The free model library for the U1 has a limited number of interesting models compared to MakerWorld. Now, this is not a huge problem on its own, because you can simply download models from MakerWorld or any other website and print them on the U1.
But here is what you lose. You lose the convenience of clicking “print” without thinking too much about the slicing profile or the parameters. On a mature ecosystem, a lot of that is done for you. On the U1, you do more of the thinking yourself.
Tradeoff 3: the slicer and app experience
Speaking of slicing, the Snorca slicer is reportedly not as smooth as the rival either. It works, but some users have reported failing to send a file to print a few times before it finally goes through. The synchronization between the PC software and the mobile app is also not the best.
None of these tradeoffs directly affect the print quality. Your prints can still come out great. What they affect is the overall user experience, the day to day smoothness of using the machine.
So again, if your priority is purely to print 4 colors as fast as possible with minimum to no waste, and you do not mind these tradeoffs, the U1 is fantastic.
Who the Bambu Lab P2S is really for
Now let us flip it around. If you are someone who wants to print things but not religiously, and you prioritize convenience and peace of mind when printing, then the P2S is clearly the better choice.
On MakerWorld there are a ton of interesting models you can print with a single click. Everything syncs smoothly across the phone app, the PC slicer, and the printer itself. In my own use I rarely experience a delay or a glitch between these. I can open my phone anytime and see exactly what my laptop software would show me. That kind of “it just works” feeling is worth a lot.
The toolhead design is also relatively simple. If it clogs, it does not take much to pull the nozzle out and clean it or replace it. And the user community is huge. If you run into any problem, you can ask around and get plenty of feedback on how to fix it.
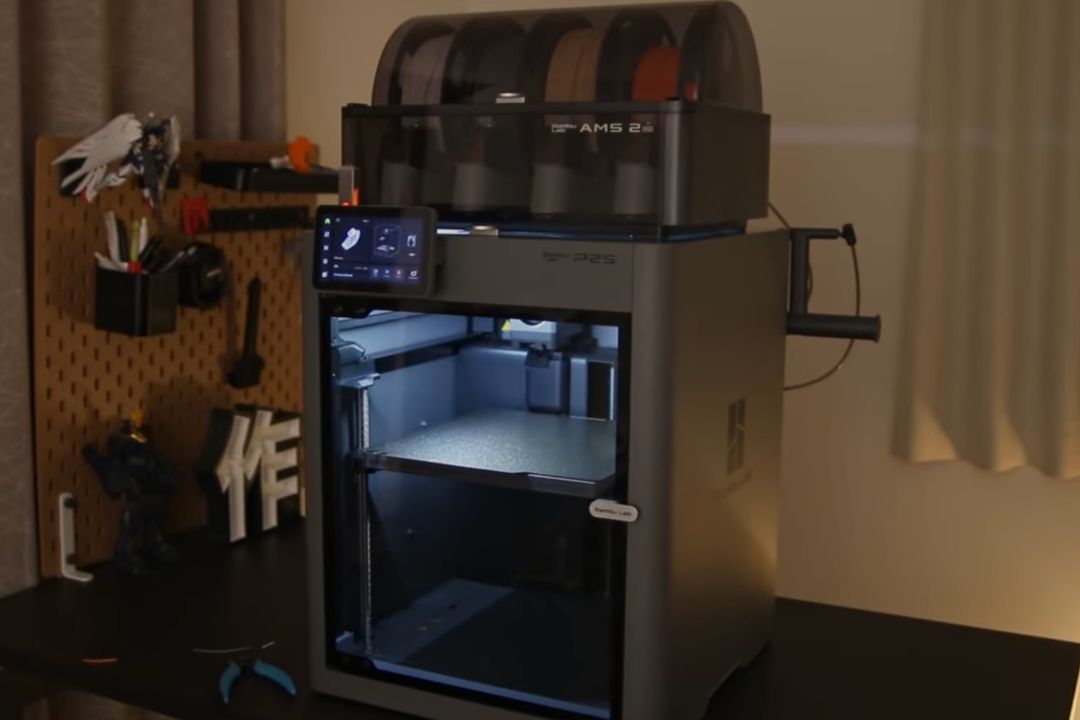
But of course, the P2S has its own tradeoff. Compared to the U1, it only has one toolhead with one nozzle. So for multi-color work, the printing time is much longer, and worse, the filament waste goes up a lot.
Do not forget about materials
Speed and waste get all the attention, but the materials each printer can comfortably handle also decides who it is for. This part is easy to overlook until you actually try to print something other than PLA.
For the everyday stuff, both machines are fine. PLA, PETG, TPU, no drama on either one.
The difference shows up when you go higher temperature or more warp-prone, like ABS, ASA, PC or nylon. The P2S is fully enclosed by design, so the chamber holds heat and helps stop those materials from warping and cracking mid-print. The U1’s enclosure is more partial and passive, so out of the box it is less comfortable with those trickier materials. If your work leans toward functional or engineering parts, that enclosure matters.
The P2S also has one more quiet advantage here. The AMS 2 Pro actively dries your filament up to 65°C while it sits loaded. For moisture-hungry materials like nylon, TPU and even PETG, that makes a real difference to print quality. The U1 has no drying built in, so you manage moisture yourself with a separate dryer or dry box.
And if you ever dream past 4 colors, only the P2S scales. You can cascade extra AMS units up to 24 colors. The U1 is fixed at its 4 toolheads.
| Material side | Snapmaker U1 | Bambu Lab P2S |
|---|---|---|
| PLA, PETG, TPU | Yes | Yes |
| ABS, ASA, PC, nylon | Possible, weaker enclosure | Better, fully enclosed |
| Filament drying | Manage it yourself | Built in, up to 65°C |
| Beyond 4 colors | No | Yes, up to 24 |
Now, the U1 is not without its own materials trick, and it is a good one. Because it has 4 completely separate toolheads, each with its own nozzle, you can run genuinely different materials in one print without them ever sharing a nozzle. No cross-contamination, no purging one material out before the next. On a single-nozzle machine like the P2S, everything squeezes through the same hotend, so true multi-material printing is much messier. So if clean multi-material is your thing, the U1 actually pulls ahead here.
The numbers that started this whole conversation
This is the part that really matters, so let me show you real results, not marketing claims.
A while back I wrote an article introducing the U1, where I compared the same model printed on the U1 and the P2S. The U1 finished in 3.5 hours. The P2S took more than 11 hours. I did not measure the filament waste that time, but you could see the difference with your own eyes.
This time I printed a 4-color panda model to compare again. A few months back, the P2S took about 9 hours 34 minutes to print that model. This time, the U1 printed the exact same model in just 2 hours 13 minutes. And the filament waste? The U1 basically purged 0 grams during the printing process, compared to 172 grams of waste on the P2S.
To be completely fair, the U1 did purge a little bit of filament during loading, before the print started. I will attach the visual comparison so you can see it for yourself.
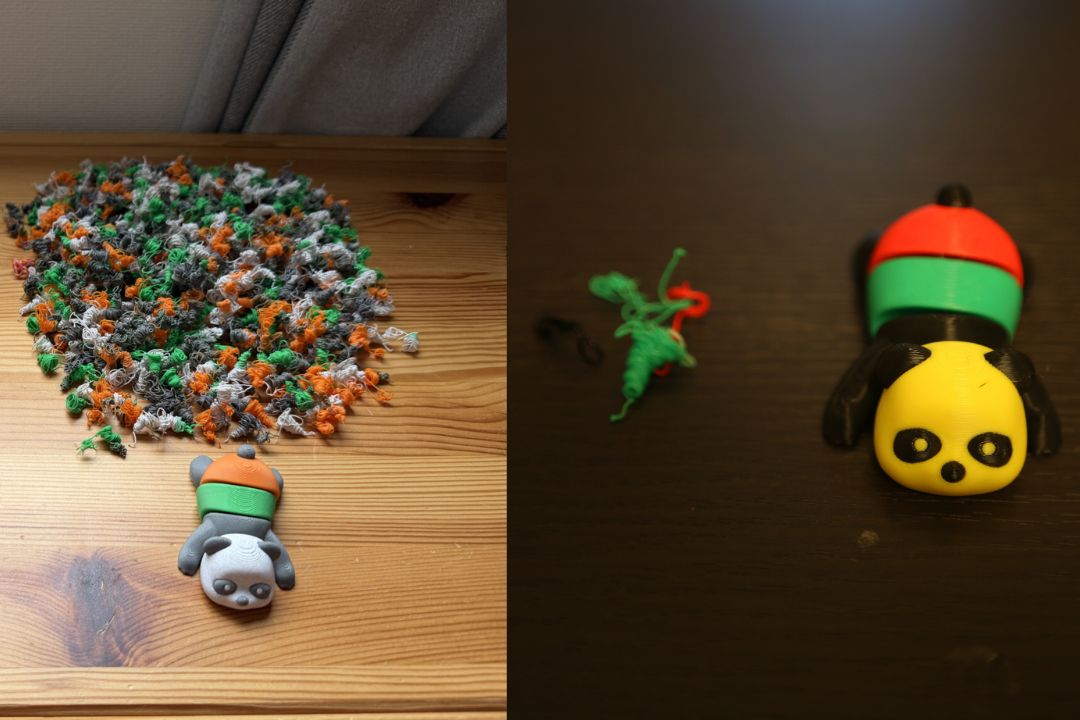
Here is the head to head on the panda model:
| Panda model (4 colors) | Snapmaker U1 | Bambu Lab P2S |
|---|---|---|
| Print time | 2h 13m | 9h 34m |
| Filament purged during print | ~0 g | 172 g |
So how significant is this really?
Even for a small model like this panda, the P2S already purged 172 grams of waste filament.
Now let us do the math on a slightly bigger print. Say you print something that purges 300 grams of waste throughout the process. Assuming 1 kg of filament costs you around RM50, that 300 grams is RM15 thrown straight into the bin, in purge waste alone, for a single print.
Print that 100 times and you have thrown away roughly RM1,500 in purge waste alone. That is the real significance the toolchanger brings to the conversation. It is not just faster. Over time it can genuinely save you real money in filament.
So which one should you buy?
I will never tell anyone “X is better than Y, you should buy X.” That is not my job, and it is not fair to you.
What I believe is that the public deserves to know the real pros and cons of each printer, and then decide for themselves which one sits closer to their own priorities.
If you print multi-color often, you want it fast, you hate wasting filament, you like the idea of clean multi-material prints, and you are comfortable getting your hands dirty when something breaks, the Snapmaker U1 is a brilliant machine for you.
If you print casually, you lean toward higher-temperature or engineering materials, you value convenience, a mature ecosystem, one-click printing and peace of mind more than raw multi-color speed, the Bambu Lab P2S Combo is the easier machine to live with.
Same RM3,999. Two very different machines. Now you know which one is talking to you.
Don’t miss the latest articles and guides
Get new Domechy articles, guides and free models straight to your inbox.

Terima kasih atas perkongsian yang baik dan adil
terima kasih atas maklum balas