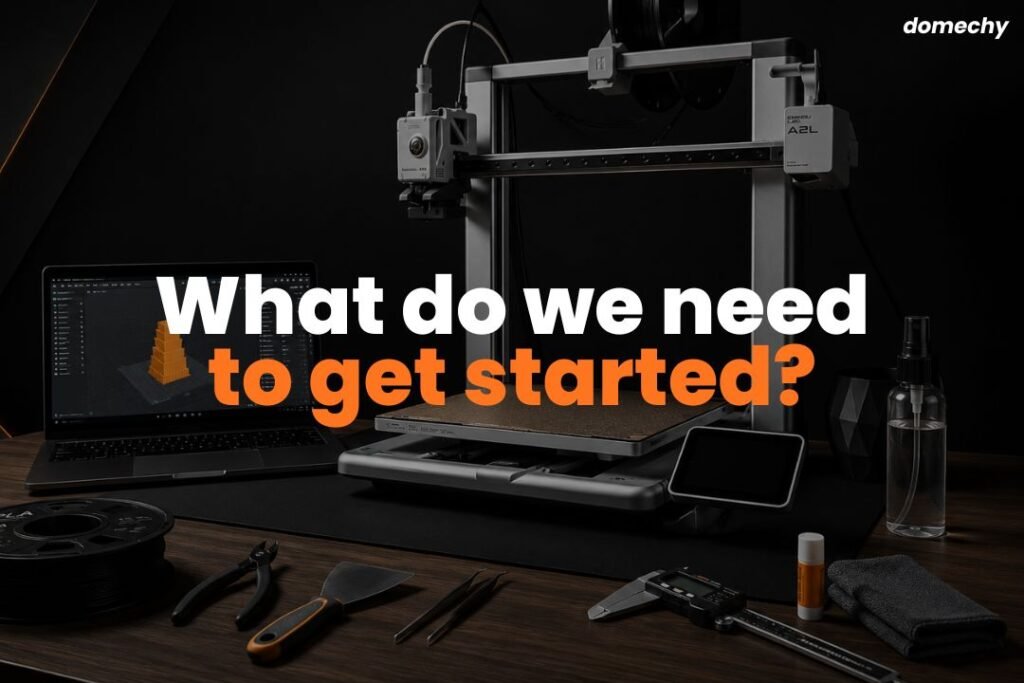

Buying a 3D printer is only the first step. To produce your first successful print, you will also need filament, slicing software, a 3D model and a few basic tools.
However, beginners do not need to buy every accessory immediately.
Many items that appear essential in 3D printing videos are only useful for certain materials or projects. Buying everything at once increases the cost and can make the learning process feel more complicated than it actually is.
This guide separates the essentials from the useful extras and the accessories that can be purchased later.
Quick 3D Printing Starter Checklist
| Item | Priority | Purpose |
|---|---|---|
| FDM 3D printer | Essential | Produces the physical object |
| PLA filament | Essential | Material for the first prints |
| Slicing software | Essential | Prepares the model for printing |
| 3D model | Essential | The digital object to be printed |
| Computer or suitable device | Essential for most workflows | Runs the slicer and manages files |
| Side cutters | Very useful | Cuts filament and small supports |
| Build plate cleaning supplies | Very useful | Helps maintain first-layer adhesion |
| Filament storage container | Useful | Reduces exposure to moisture |
| Digital caliper | Useful for design work | Measures objects and printed dimensions |
| Filament dryer | Depends on the material | Removes moisture from filament |
| Glue or adhesion aid | Not always required | Improves adhesion or acts as a release layer |
At the most basic level, you only need a printer, one spool of filament, slicing software and a printable model.
Other equipment can be added once you understand the type of projects you want to make.
1. An FDM 3D Printer
The first requirement is an FDM 3D printer.
However, the best beginner printer is not necessarily the cheapest machine or the one with the highest specifications.
Important factors include:
- The type of projects you want to make
- The size of the objects
- Your budget
- Level of automation
- Availability of spare parts
- After-sales support
- Filament types you plan to use
- Available workspace
For beginners, a reliable printer with good slicer profiles and a straightforward setup is usually more useful than a machine that requires extensive manual calibration.
Features such as automatic bed levelling, automatic Z-offset, filament runout sensors and material presets can reduce setup work.
However, automated features do not eliminate every possible problem. Users still need to understand basic principles such as build plate cleanliness, model orientation and slicer settings.
Specific printer models are better covered in a separate buying guide.
2. Filament for Your First Prints
FDM printers use filament as their raw material.
For the first few prints, PLA is usually the most suitable choice.
PLA is beginner-friendly because it:
- Is less prone to warping
- Prints at relatively low temperatures
- Usually does not require an enclosure
- Is available in many colours
- Works well for models, organisers and prototypes
- Is suitable for learning basic slicer settings
A standard spool usually contains around 1 kg of filament. This is enough for many small and medium-sized objects.
Beginners do not need to buy PLA, PETG, TPU, ABS and nylon at the same time. Each material has different printing requirements and settings.
It is better to begin with one good-quality spool of PLA, understand the printing process and only buy other materials when a project requires them.
For example:
- Use PETG for tougher everyday parts
- Use TPU for flexible components
- Use ASA for certain outdoor applications
- Use nylon for selected mechanical applications
Filament should be chosen according to the intended function, not simply because one material is described as stronger.
3. Slicing Software
Most 3D printers cannot print a model file directly.
The model first needs to be processed using software known as a slicer.
A slicer digitally divides the model into hundreds or thousands of thin layers. It then generates the instructions that tell the printer how to build the object.
Common slicer settings include:
- Layer height
- Nozzle temperature
- Build plate temperature
- Print speed
- Wall count
- Infill
- Supports
- Cooling
- Filament type
- Model orientation
Popular slicers include:
- Bambu Studio
- OrcaSlicer
- PrusaSlicer
- Cura
Most major slicers are free to use.
For your first prints, use the official profile provided for your printer and filament. Avoid changing too many settings at once before understanding what each setting does.
A well-prepared preset is usually enough for a successful first print.
4. A 3D Model to Print
Every print begins with a digital 3D model.
There are three common ways to obtain one:
- Download an existing model
- Design your own model
- Modify an existing model, if the original licence allows it
Popular model platforms include:
- Printables
- MakerWorld
- Thingiverse
- Thangs
Common file formats include:
- STL — a widely used mesh format for 3D printing
- 3MF — can store additional project and print information
- STEP or STP — an editable CAD format
- OBJ — often used for visual models and textures
For your first print, choose a model that is simple, relatively small and does not require extensive supports.
A calibration cube, small tray, simple phone stand or organiser is a better starting point than a complex model that takes dozens of hours to complete.
Before selling printed objects made from downloaded files, check the licence. Not every free model allows commercial use.
5. A Computer or Suitable Device
A computer is commonly used to:
- Open the slicer
- Set the model orientation
- Generate supports
- Save project files
- Send files to the printer
- Create models using CAD software
Some modern printers can also be controlled through a mobile application. Users may be able to select models, start prints and monitor the printer using a phone.
However, a computer is still more practical for slicing, support preparation and design work.
You do not need an expensive gaming computer for ordinary slicing. A modern mid-range computer is usually sufficient.
More powerful hardware becomes useful when working with very large mesh files, complex CAD assemblies or rendering software.
6. Basic Tools
Most printers include a few basic tools in the box. However, several additional items are useful for everyday printing.
Side Cutters
Side cutters can be used to:
- Trim the end of the filament
- Remove excess filament
- Cut small support sections
- Clean up parts of a brim
Use them carefully because small pieces of filament or support material can fly away when cut.
Deburring Tool or Small Knife
A deburring tool can help clean:
- Brims
- Rough edges
- Support marks
- Certain holes or slots
Always move sharp tools away from your hands and body. Avoid holding a small part in a position where the blade could move towards your fingers if it slips.
Scraper
A scraper is sometimes used to remove objects from the build plate.
However, it is not always necessary.
For a printer with a flexible build plate, allow the plate to cool before bending it gently. Many prints will release without additional force.
Avoid forcing an object off while the plate is still hot, as this can damage the print surface or the bottom of the part.
Tweezers
Tweezers are useful for removing leftover filament around the nozzle.
However, the nozzle may be hotter than 200°C. Never touch the nozzle, hotend or heater block with your hands.
7. Build Plate Cleaning Supplies
A build plate may look clean while still having oil on its surface.
Oil from fingerprints can prevent the first layer from sticking correctly.
For basic cleaning, you only need:
- Water
- Dish soap
- A soft sponge
- A cloth or tissue that does not leave excessive fibres
After washing, rinse the plate and allow it to dry completely.
Avoid touching the printing area after cleaning it.
Isopropyl alcohol can be useful for light cleaning between prints, depending on the build plate type. However, it may not remove heavy grease as effectively as washing with dish soap.
Always follow the build plate manufacturer’s instructions, as different surfaces may require different cleaning methods.
8. A Suitable Place for the Printer
A 3D printer should be placed on a stable and level surface.
A lightweight or unstable table may increase vibration, noise and machine movement.
Make sure there is enough space for:
- Build plate movement
- The filament spool
- Power cables
- Filament tubes
- Enclosure doors
- Maintenance access
For a bed-slinger printer, the build plate may move a considerable distance forwards and backwards. Do not place the printer too close to a wall or the edge of a table.
The printer should also be kept away from water, busy walkways and areas where children can reach it without supervision.
For materials that produce stronger odours or more airborne particles, consider suitable ventilation and an enclosure.
9. Filament Storage
Filament can absorb moisture from the air.
When filament becomes damp, you may notice:
- Rough print surfaces
- Increased stringing
- Small popping sounds from the nozzle
- Reduced part strength
- Inconsistent extrusion
Basic storage options include:
- Airtight bags
- Sealed containers
- Silica gel
- Dry boxes
PLA is generally easier to store than materials such as nylon and TPU. However, all filament benefits from being kept dry.
A sealed container with silica gel does not necessarily dry filament that is already wet. It is mainly used to keep dry filament from absorbing more moisture.
10. Do Beginners Need a Filament Dryer?
Not necessarily.
For a new spool of PLA that has been stored properly, a filament dryer is usually not an essential first purchase.
A dryer becomes more useful when:
- The filament has been exposed to air for a long time
- The nozzle produces popping sounds
- The print surface becomes rough
- Stringing suddenly increases
- You are using TPU, PETG, nylon or another moisture-sensitive material
Filament storage and filament drying are not the same thing.
An airtight container slows down moisture absorption. A filament dryer uses heat to remove moisture that has already entered the material.
11. A Digital Caliper
A digital caliper is not essential if you only plan to print downloaded models.
However, it is extremely useful for design work and mechanical parts.
It can be used to:
- Measure hole diameters
- Measure object thickness
- Check printed dimensions
- Design replacement parts
- Determine clearance
- Test tolerances
- Measure screws or electronic components
For users who want to learn CAD or design their own products, a digital caliper is one of the most useful tools to own.
12. Glue and Other Adhesion Aids
A glue stick is not required for every print.
With a clean build plate and the correct settings, PLA can usually stick well to many modern print surfaces without glue.
In certain situations, glue may be used to:
- Improve first-layer adhesion
- Reduce the risk of warping
- Act as a release layer
- Protect the build plate from specific materials
For materials such as PETG, glue is sometimes used as a separating layer to prevent the print from bonding too strongly to certain surfaces.
Do not apply glue automatically for every print. Check the recommendations for the build plate and filament first.
Equipment You Do Not Need to Buy Immediately
Beginners do not need to purchase all of the following at the start:
- Multiple nozzle sizes
- An additional enclosure
- An expensive filament dryer
- An airbrush
- A sanding machine
- A large filament storage system
- Large quantities of spare parts
- Engineering-grade filament
- Several types of adhesive
- A complete post-processing setup
Buy accessories according to an actual project or problem.
For example, if you only print PLA, you may not need an enclosure. If you are not designing your own parts yet, a digital caliper can also wait.
Avoid buying equipment simply because it appears frequently in other people’s setups.
A Practical Minimum Setup
A simple starting setup includes:
- One FDM 3D printer
- One spool of PLA
- Free slicing software
- One free 3D model
- Side cutters
- Dish soap for cleaning the build plate
- A stable table
With this setup, you can already learn how to load filament, use a slicer, produce a good first layer and complete your first print.
Checklist Before Your First Print
Before pressing Print, check the following:
- The printer has been assembled correctly
- Shipping screws and packaging materials have been removed
- The build plate is installed correctly
- The build plate is clean
- The filament is loaded correctly
- The correct printer and nozzle profiles are selected in the slicer
- The correct filament type is selected
- The correct build plate type is selected
- The model has been sliced without errors
- No cables or objects block the printer’s movement
- The printer has enough clearance around it
- The first layer is observed before the printer is left unattended
The first layer is an early indicator of whether the print will continue correctly. If the filament does not stick, appears excessively thin or gathers around the nozzle, stop the print and investigate the problem.
Final Thoughts
To start 3D printing, you only need a printer, filament, slicing software and a 3D model.
Tools such as side cutters, filament storage containers, digital calipers and filament dryers can help, but they are not all essential on the first day.
Begin with a simple setup. Use PLA, choose an easy model and learn with the official slicer profiles first.
Once you understand the basic process, add equipment according to the projects, materials or actual problems you encounter.
This approach is more economical and makes it easier to separate genuinely useful tools from accessories that simply look impressive.
Looking to buy a 3D printer in Malaysia?
We’ve put together a curated list of 3D printing shops, filament suppliers, and service providers across Malaysia.
View the directory →
Pingback: Apa yang Diperlukan untuk Mula 3D Printing? Checklist Lengkap | Domechy